
System integration
Banners are graphic images of advertising nature used by affiliates for promoting your goods and services.
To make affiliates' work more effective, we recommend adding at least 10 banners of various sizes for various product categories.
Banner requirements
Before adding banners, read the requirements
General requirements
- To launch a program in Mitgame, you must have generally themed banners, which contain information about the program, regardless of seasons, brands, prices, or deals. They'll be used to replace the expired banners.
- Banners must contain your program's logo.
- Banners must contain up-to-date information.
- There should be no banners for a specific product: it may be out of stock, or the price on the banner may differ from the actual one. Only create banners for a specific category or deal.
- No more than one banner of each size for one category or deal.
- Deal banners must be uploaded to the website 2-3 days before the related campaign begins.
- Allowed banner formats: JPG, PNG, GIF, HTML5.
JPG, PNG, and GIF banners requirements
- Max file size (static or dynamic): 100 KB.
- Banner file name must only contain the banner size (no spaces) and the extension (.swf, .jpg, etc.).
For example:
120x600.jpg - Allowed banner sizes:
- Width — no less than 110 px.
- Heith — no less than 50 px.
- Example:
120 x 600 160 x 600 200 x 200 200 x 300 240 x 400
300 x 250 336 x 280 468 x 60 500 x 500 600 x 90 728 x 90
These sizes are most popular among affiliates and most clickable among users.
HTML5 banner requirements
- A banner must be a ZIP archive.
- Max archive size: 256 KB.
- An archive must contain less than 40 files.
- The archive root must include a file named index.html
- Other allowed file formats in the archive: .html, .css, .js, .png, .jpg, .jpeg, .gif, .svg.
- A banner must contain a meta tag with the size data.
For instance, if a banner has the 240x400 resolution, then:
<meta name="ad.size" content="width=240,height=400" /> - When the banner is displayed, the transition link will be in the GET parameter link1.
- You can initiate a click-through in one of the following ways:
- by importing the following script:
<script type="text/javascript"
>
and calling setURL()
<a ="setURL()">text of link</a> - or by adding the following element:
<a href="%link1%" target="_blank">text of link</a>
and calling
document.addEventListener(‘DOMContentLoaded’, function(){updateAttrs();});
or in any other way.
- by importing the following script:
- The transition link must come from the GET parameter link1 and open in a new window.
You upload banners to your program on Mitgame (on your own or through a personal manager)
In this case, banners must comply with the following requirements:
- Allowed banner formats: JPG, JPEG, and PNG.
It's not allowed to add GIF or HTML5 banners. - Allowed banner size:
- Width: at least 110 px
- Height: at least 50 px
Adding new banner categories
To add banners, create categories for them first.
The categories are folders where ad creatives similar in the following attributes are stored:
- Brands and product groups they advertise: Puzzle, Action, Multiplayer.
- Deals and events for which they are created: Prom 2018, Cyberweek.
- Countries (if your program operates in several regions and you plan to upload banners in various languages or with different terms for different regions).
Affiliates also need these categories. They use them to find relevant banners on your program's page. Make sure your categories have clear names and distribute banners between them accurately.
1. To create a category, click Advertising tools → Creatives → Banner categories, then click Add new category.

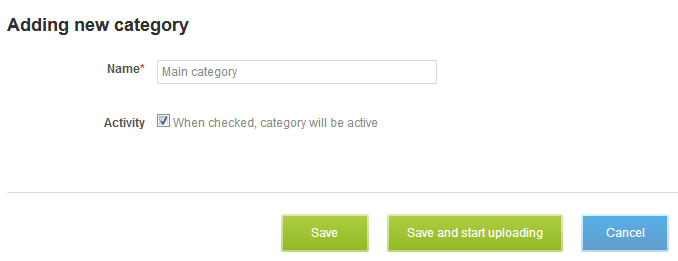
2. First, you need to create a universal category that will be active for an unlimited time. You can't deactivate or hide it, but you can rename it whenever you need.
2.1. Enter the category name. Remember that affiliates will see it.
2.2. Flag Activity to activate the created category and make it visible and available to affiliates.
3. After you create the universal category, you can start adding others.
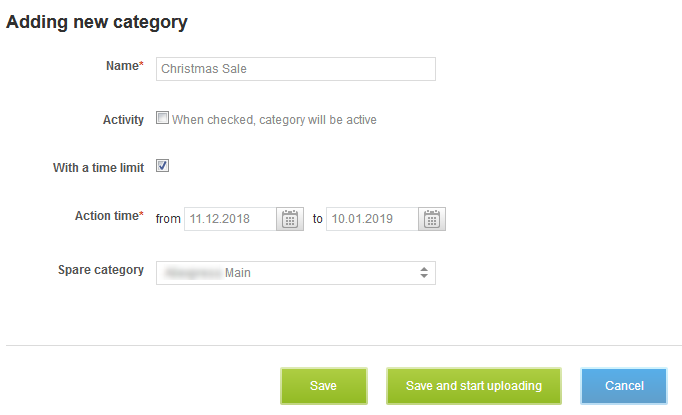
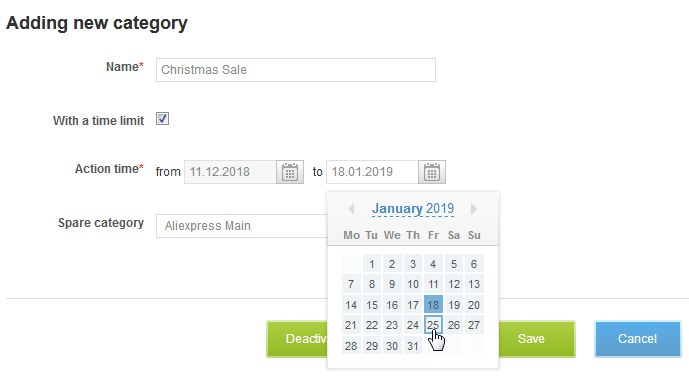
3.1. Please note that the With a time limit field will be flagged by default in other categories' settings. It may be handy if you want to add a category that will be only active during a specific deal. In this case, in the Time of action field, select the start and the end dates of the category activity and unflag Activity. The category will be activated automatically on the start date and disappear on the end date.
If you leave the Activity box flagged, the start date will be replaced with the current date, and the category will become active right away.
3.2. When adding a time-limited category, you have to select a spare category. A spare category should have no time limit. You can use a universal category.
It's highly advisable that the spare category contains banners of the same size as the main category. In this case, when the main category expires, and its banners are hidden, the same-size banners from the spare category will replace them. Traffic will keep on coming. But if the spare category doesn't have a banner of the relevant size, the banner's place in the affiliate's ad space will become empty.
If no time limits are required, unflag With a time limit. After that, decide whether you want to activate the category now or keep it hidden.
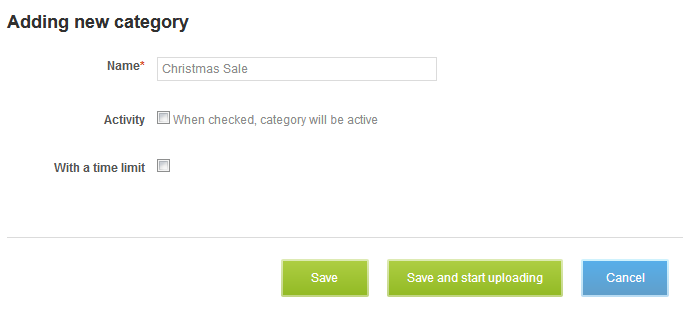
3.3. Click Save or Save and start uploading if you want to add banners to the newly created category. Read more about it in Adding banners.
The newly-created category will appear in the general list. Here, you can see the number of ad creatives in this category, category lifetime, etc.
Changing categories
After creating a category, you can do the following:
- Rename it.
- Extend or shorten its lifetime (for time-limited categories only).
- Hide or show.
The Hide option allows hiding ad creatives of a category created, say, for a future deal—so nobody can see the deal terms ahead of time. If a category is already hidden, and you want to make the banners visible, click Show. - Deactivate it.
Deactivation is similar to scheduled deletion. When deactivated, the category and its banners are hidden from affiliates after the specified number of days. But they keep generating traffic for about a week, after which the category and its banners are deleted permanently. How to deactivate a category - Delete it.
The category and its banners will be deleted after the specified period. How to delete a category
To rename a category, change its lifetime, hide or show it, go to the category settings page. For that, in Tools, click .
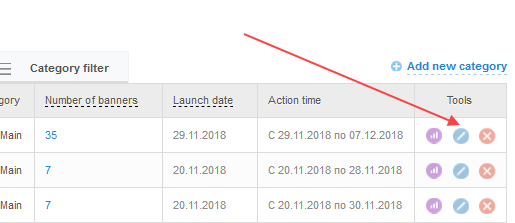
And make changes.
Deleting and deactivating categories
According to the Mitgame rules, affiliates should be informed of the changes no later than 5 days before such changes. They need this time to remove ad creatives from their ad spaces.
To delete or deactivate a category,
- Contact your account manager
- Or follow the guide below (if you have the required rights).
1. No later than 5 days before the deletion/deactivation date, inform your manager of deactivating or deleting a category. The manager will then send newsletters to affiliates.
2. After the manager tells you they have informed the affiliates, do the following:
- To delete a category, click
in Tools.
- To deactivate a category, click
, then Deactivate.
3. In the pop-up window, specify the period the category will be deleted or deactivated. Click Save.
Done! Deletion or deactivation is scheduled.
Before the scheduled day, the category and its ad creatives will be shown in the list with the Being deactivated or Being deleted status.
If the category status was changed to one of these, you can't change the category or cancel deactivation or deletion.
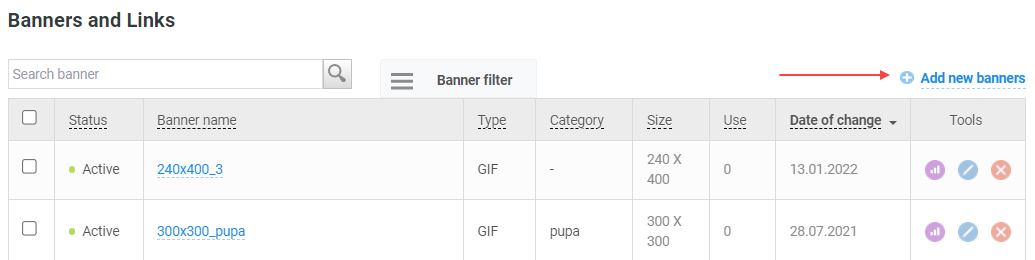
Adding banners
After creating banner categories, you can start uploading your banners. For that, click Advertising tools → Creatives → Banners, then click Add new banners.
1. Select the category to which the banner belongs.
2. If you need a user to follow not a standard affiliate link but land on a specific product group or deal page, specify the link for the banner.
2.1. To do that, in the Link field, paste the address of the page where the user should be taken. For instance, http://website.com/catalog/adventure-games/quests/
2.2. After that, add the parameters from the Tracking link for the website field (Program → General settings).
Example: ?utm_medium=cpa&utm_source=mitgame&utm_campaign={{affiliate_id}&utm_content={{affiliate_id}}&mitgame_uid={{mitgame_uid}}
2.3. The final link will look as follows:
http://website.com/catalog/women-shoes/loafers/?utm_medium=cpa&utm_source=mitgame&utm_campaign={{affiliate_id}&utm_content={{affiliate_id}}&mitgame_uid={{mitgame_uid}}
BUT: If the landing page's URL already contains a "?", the question mark that starts the parameter list must be replaced with a "&".
Link:
http://www.yoursite.com/?hl=com
Parameters:
?mitgame_uid={{mitgame_uid}}
Here's what you'll get:
http://www.yoursite.com/?hl=com&mitgame_uid={{mitgame_uid}}
3. In Access rights, you can select who will be able to access the uploaded creative: participants of specific channels or groups (if you have some) or specific affiliates.

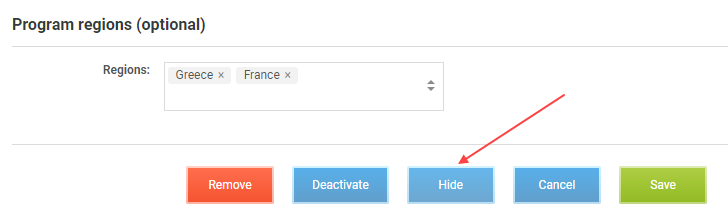
You can also specify the regions for which this ad creative will be created. This may come in handy if you upload banners in different languages or deals only active for specific regions. Using this filter, affiliates will find the banners in the relevant language or with an active deal.
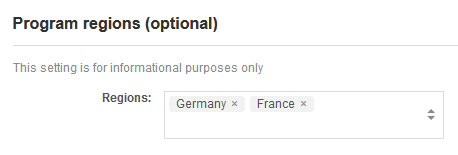
By default, a banner is for all affiliates and all regions.
4. Click Continue. You'll be taken to the page where you add banners. Upload banner files one by one, or add them in a group.
Remember that banner sizes must match those specified in the requirements. Otherwise, you'll see the Invalid banner size error.
If the banners are successfully uploaded, you'll see their respective thumbnails below.
If you decide to change a banner's name, category or give it a unique link, click the corresponding field and make the changes.
5. Click Save, and your banner will be uploaded with the Active status—i.e., it'll be visible to affiliates on the program page.
Changing banners
To edit a banner, go to the ad creative list and click .
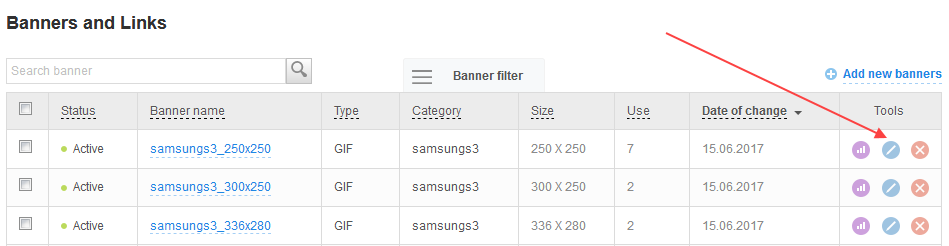
You'll land on the banner editing page where you can do the following:
- Change a banner's name, category, or region
- Give a banner a new link
- Restrict or extend access rights for affiliates
- Change a banner's image.
You can also hide a banner. In this case, it'll get the Hidden status, and the users won't see it.
If you need to change the links for several banners, you might want to use group editing. For that, flag the banners you want to edit in the list, select an action, then click Apply.
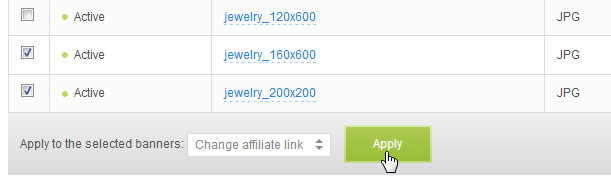
Enter the new link for the selected banners.
Deleting and deactivating banners
According to the Mitgame rules, affiliates should be informed of the changes no later than 5 days before such changes. They need this time to remove ad creatives from their ad spaces.
To delete or deactivate a banner,
- Contact your account manager
- Or follow the guide below (if you have the required rights).
1. No later than 5 days before the deletion/deactivation date, create a ticket in which you inform your manager of deactivating or deleting a banner. The manager will then send newsletters to affiliates.
2. After the manager tells you they have informed the affiliates, do the following:
- To delete a banner, click
in Tools.
- To deactivate a banner, click
, then Deactivate.
3. In the pop-up window, specify the period the banner will be deleted. Click Save.
Done! Deletion or deactivation is scheduled.
Before the scheduled day, the banner will be shown in the list with the Being deactivated or Being deleted status.
If the banner status was changed to one of these, you can't change the banner or cancel deactivation or deletion.
Uploading banners with a manager
If it's your account manager who uploads your banners,
- Be sure to submit the banners to the managers 3−5 days before the date when you want them to be added to the system.
- All banners must meet the requirements.
- For each banner, the following must be specified:
- Category it should be uploaded to
- Lifetime (if they should be limited in time)
- Region (regions where the banner will be shown)
- Group, channel, affiliate username (if the banner was created for specific affiliates).