
If your website is Magento-based, you can easily integrate it with Admitad using an Admitad plugin.
A plugin is a software module that you need to install and set up on your website. As a result, your website will be integrated with the Admitad system.
General information. Features and tips
- You can only initiate integration if your program has the following:
- A tracking link generated in General Settings.
- A target action added and a related rate set up in Actions.
If you don't have a manager, you'll need to generate a tracking link on your own (see this guide) and add at least one action and at least one rate (see this guide).
If you have a personal manager, they can do all that for you.
- Integration is a mandatory step to continue your work and launch an affiliate program with Admitad.
- To set up integration, you need access to your Magento website's admin panel. Or you can send this integration guide to a colleague who has this access.
Once the integration is complete, all target action details (date, order ID, order amount, etc.) will be sent to Admitad automatically.
Integration process
To integrate your website using a Magento plugin, follow these steps (a guide for each is provided below):
- Do some preps
- Install the Magento plugin
- Log in to Admitad
- If necessary, use additional settings:
- Test your integration
- If necessary, remove the plugin from your website
How to prepare to install a Magento plugin
Before installing, purchase the latest version of the plugin on Adobe Commerce Marketplace:
1. Open https://commercemarketplace.adobe.com/ and log in to your account.
If you don't have an account, create one.
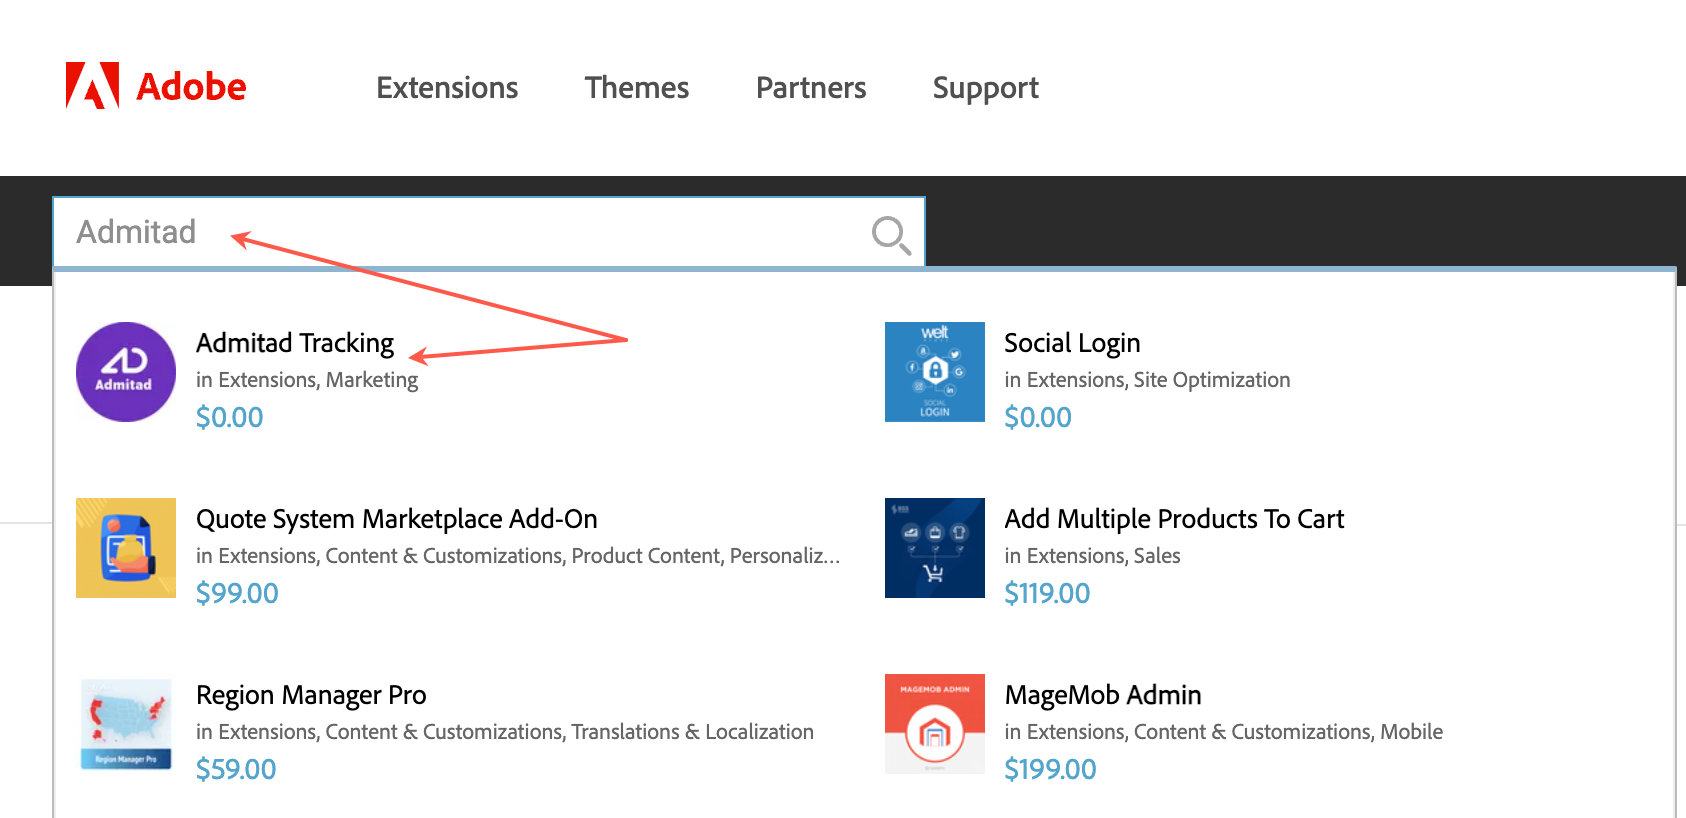
2. Go to the Admitad plugin page:
- Follow this link: https://commercemarketplace.adobe.com/admitad-track.html.
- Or find the plugin in the Marketplace section by typing Admitad into the search field.
3. On the Admitad Tracking page, make sure the following values are selected in the form fields:
- Edition – Magento Open Source
- Your store version – 2.4 (Magento Open Source)
Then click Add to cart.
4. In the upper right-hand corner, click the cart icon and click Proceed to Checkout.
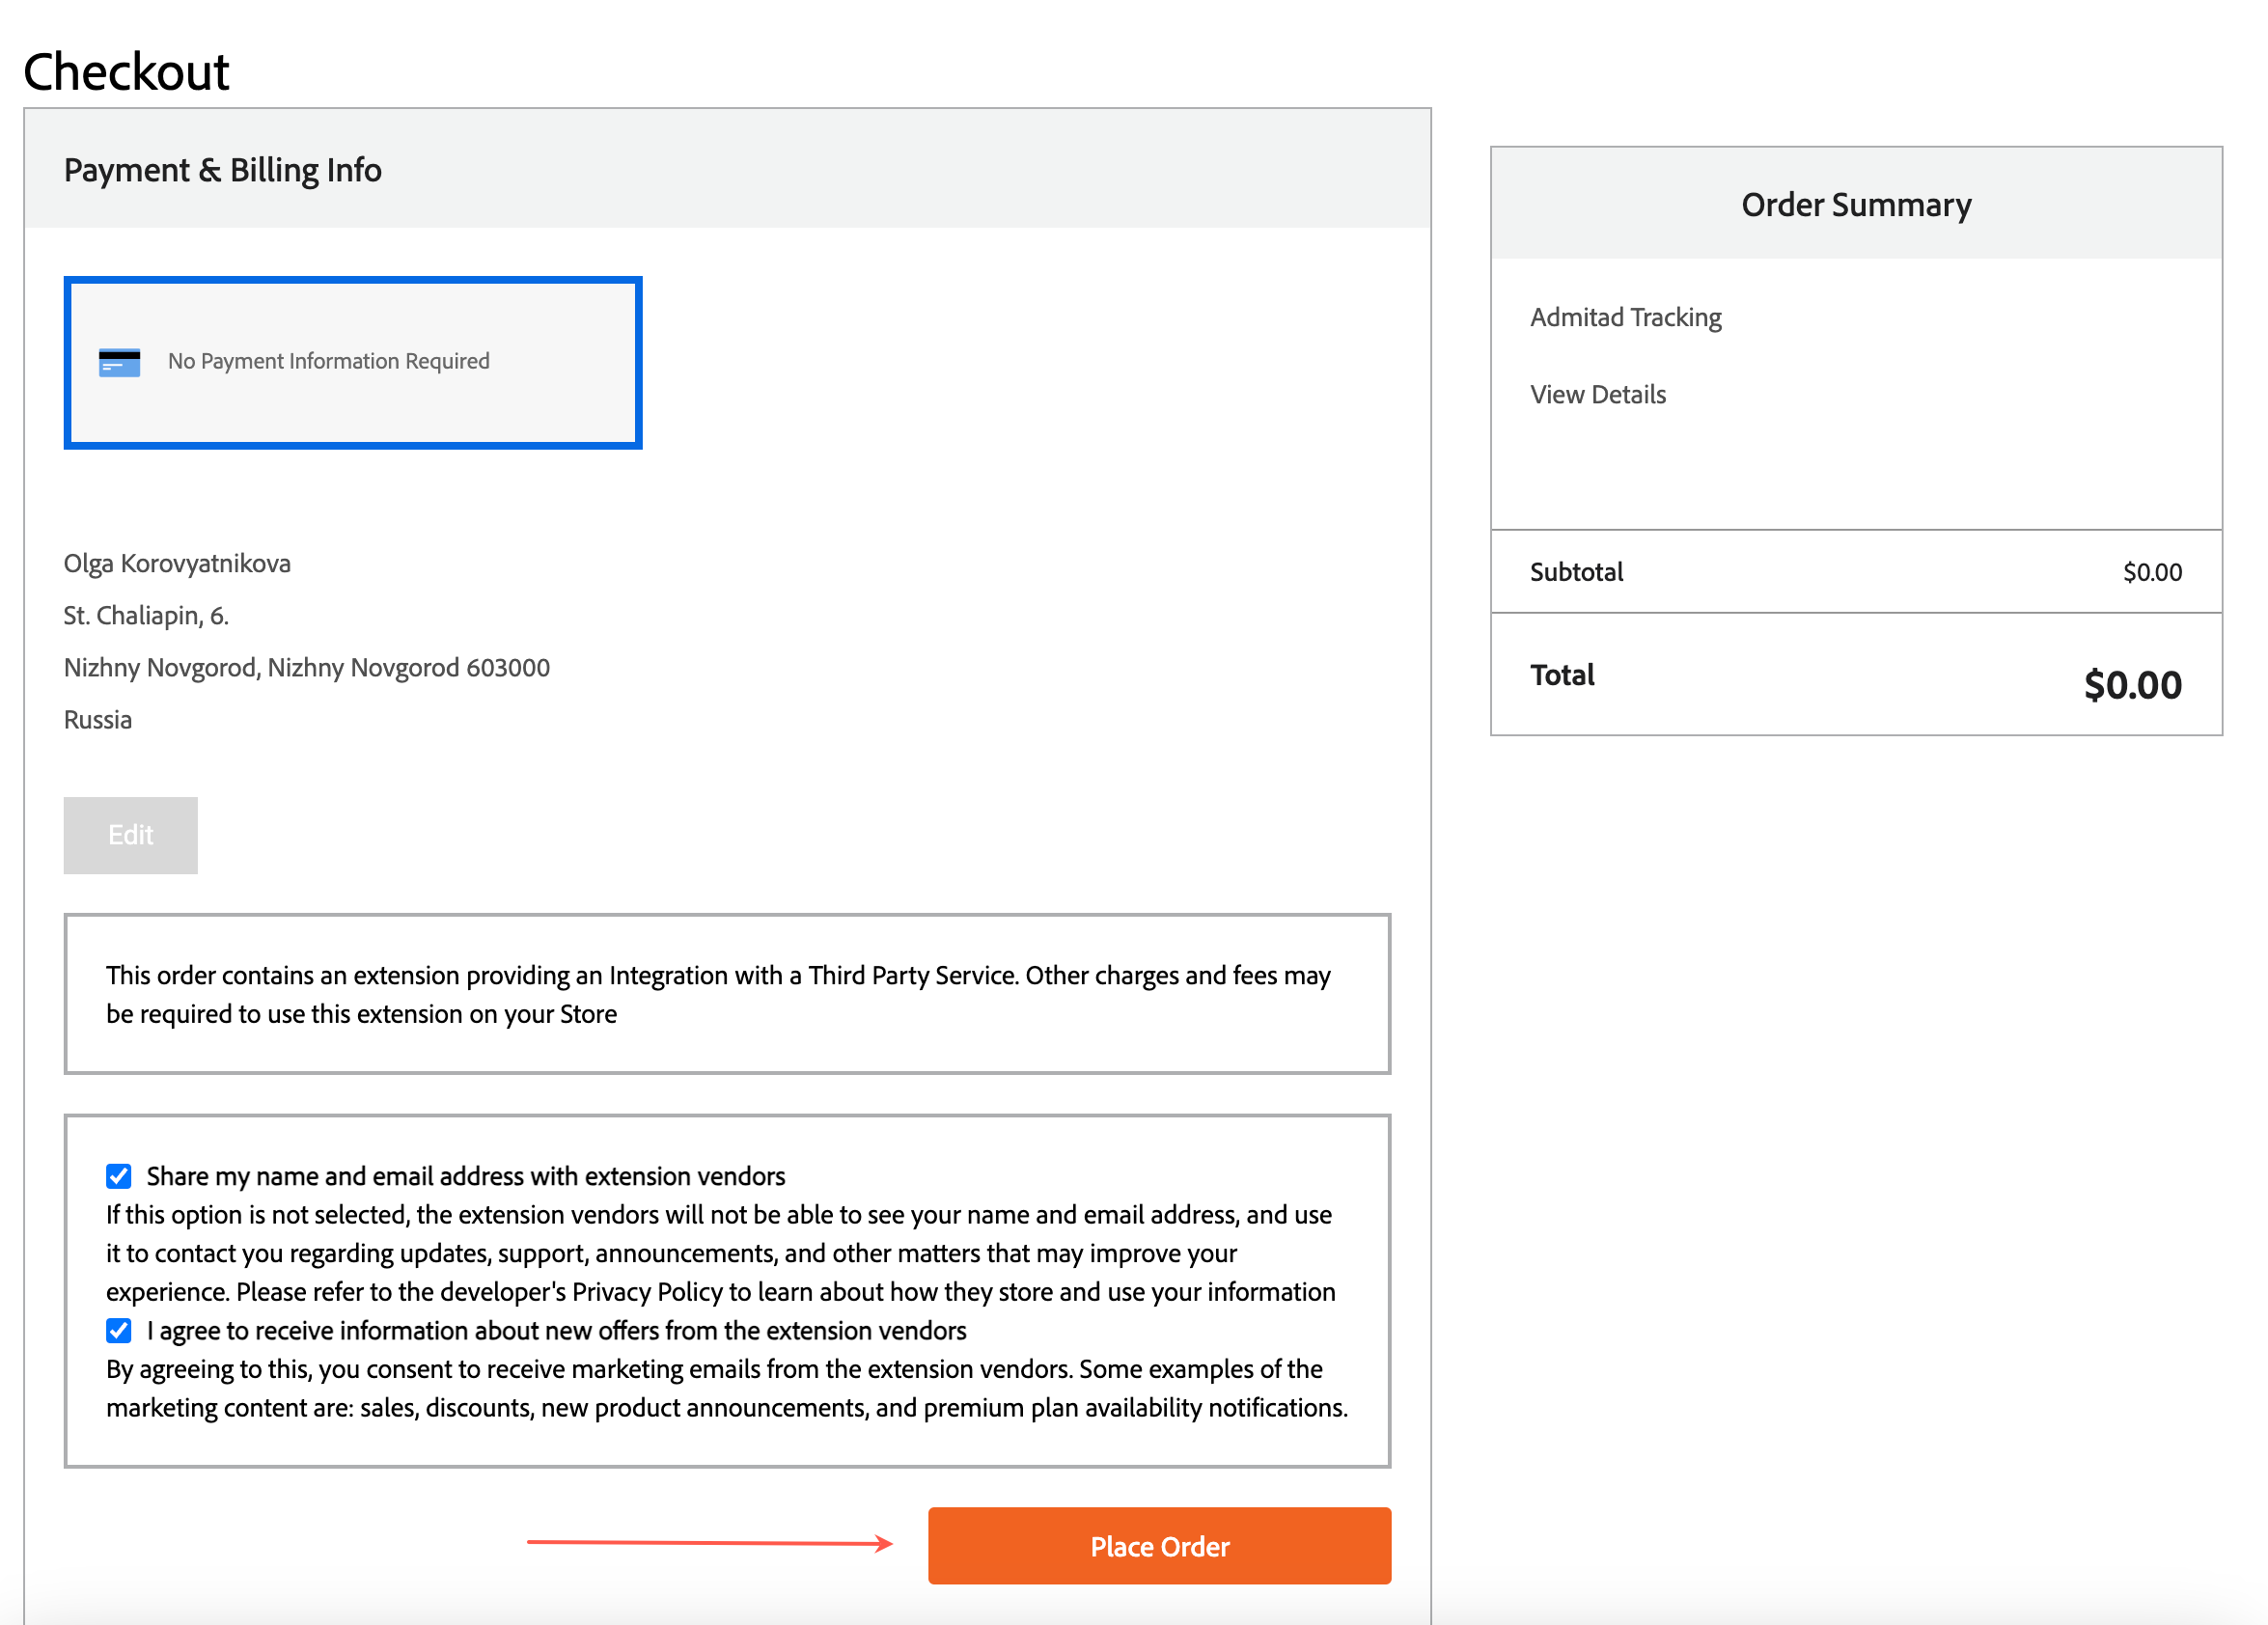
5. Provide your information on the order creation page and click Place Order.
After you purchase the plugin, it'll appear in your Magento Marketplace account in the My Purchases section (My Profile → Marketplace → My Products → My Purchases).
6. Go to Access Keys (My Profile → Marketplace → My Products → Access Keys).
7. Click Create A New Access Key.
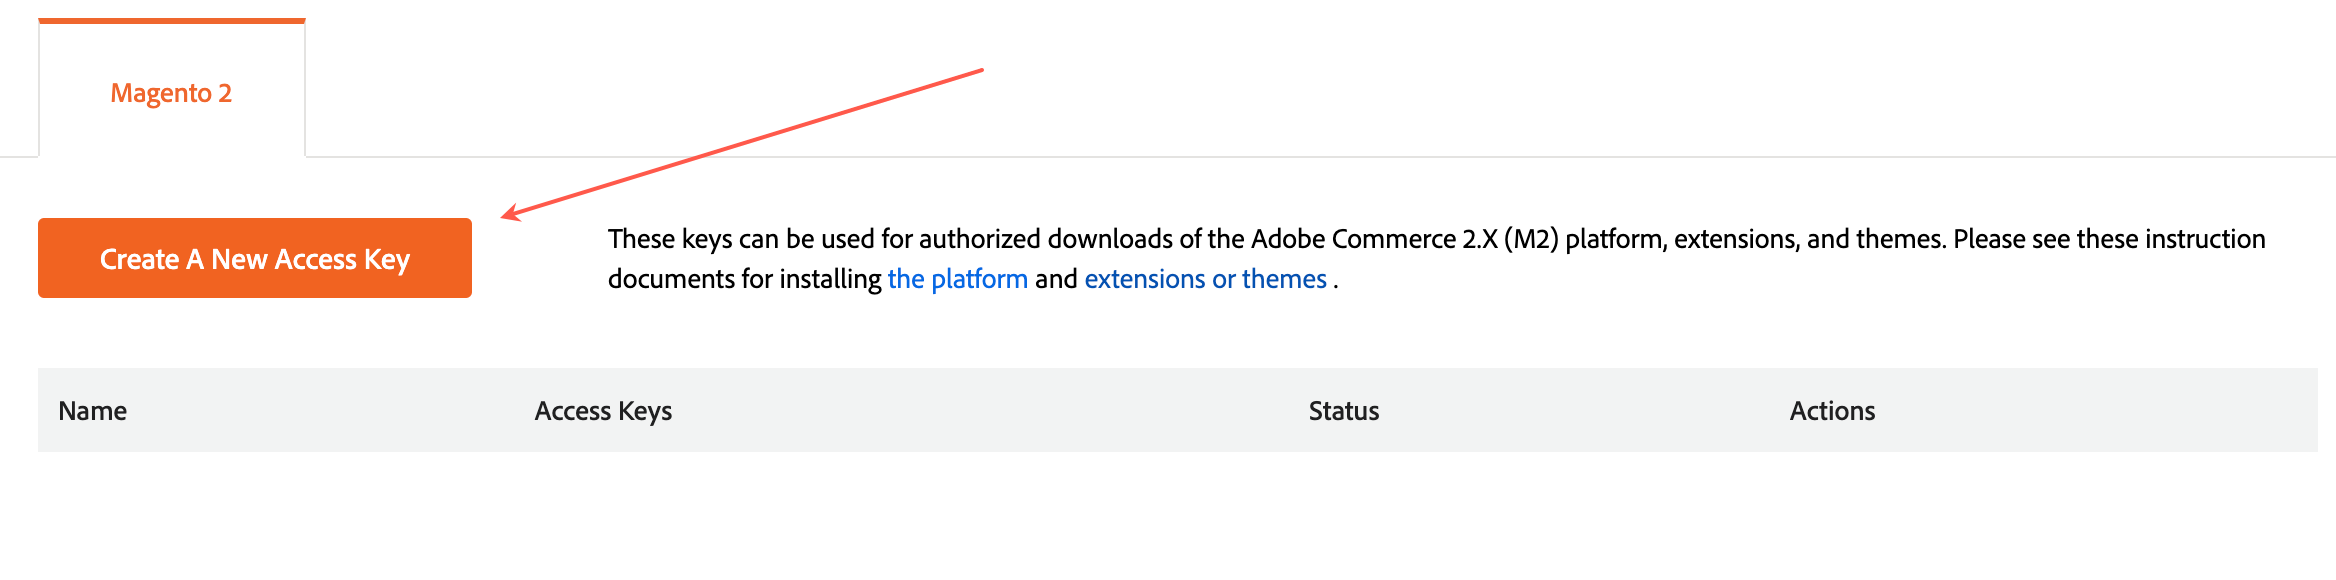
8. Enter the authentication key name in the new form and click OK.
A public and a private key will be created for you. You'll need them to install the plugin.
How to install a Magento plugin
After you've purchased the plugin and generated an authentication key, do the following to install the extension with the plugin:
1. Make sure composer.json contains the repo.magento.com repository:
"repositories": [ { "type": "composer", "url": "https://repo.magento.com/" }]2. Get the extension name and version. Where you can find this information
3. Update composer.json in your project. How to do that
4. Make sure the extension has been installed correctly, then enable it. Learn more
Where you can find the extension name and version
1. Go to My Purchases (My Profile → Marketplace → My Products → Access Keys).
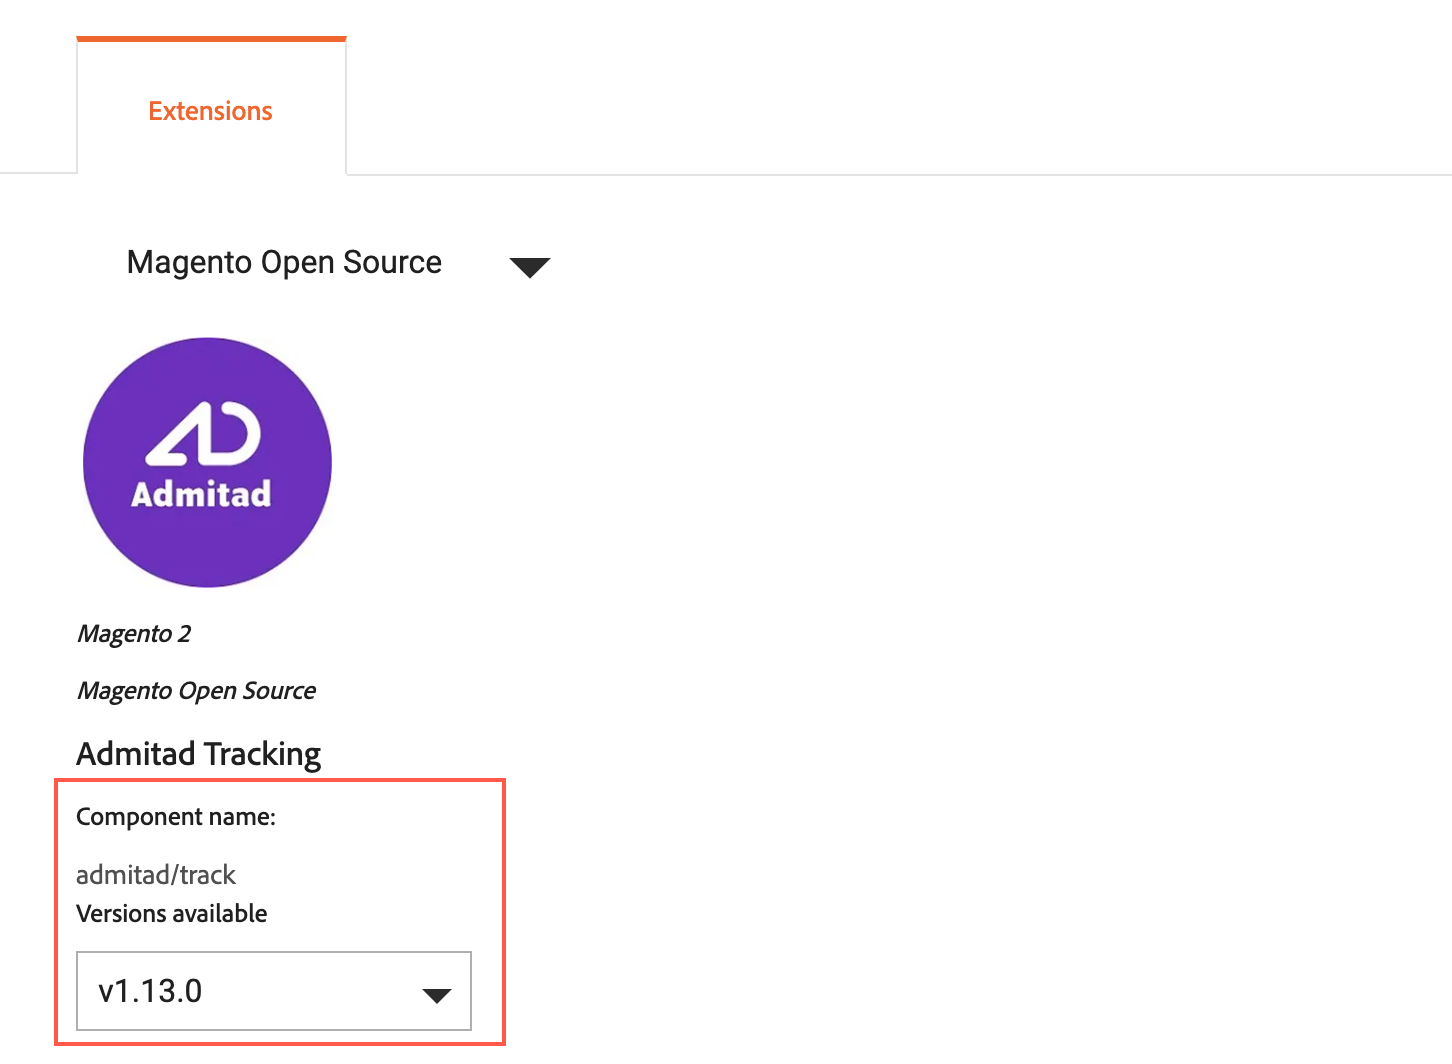
2. You'll find extension information in the Extensions tab:
- Component name. This is the extension name.
- Versions available. From the dropdown menu, select the extension version you want to install.
How to update composer.json in your project
1. Go to your project's catalog and add the extension name and version to composer.json:
composer require <component-name>:<version>For example, indicate the following:
composer require j2t/module-payplug:2.0.22. Enter the authentication keys you generated earlier.
You can find them in Access Keys (My Profile → Marketplace → My Products → Access Keys).
- Public key is your username.
- Private key is your password.

3. Wait until the file is updated and double-check for errors.
The following message should appear:
Updating dependencies (including require-dev)Package operations: 1 install, 0 updates, 0 removals - Installing j2t/module-payplug (2.0.2): Downloading (100%)Writing lock fileGenerating autoload filesHow to enable the extension
1. Make sure the extension was installed correctly.
To do that, run the following command:
bin/magento module:status J2t_PayplugThe extension will be disabled by default.
Module is disabled2. The extension name will be shown in the following format: <VendorName>_<ComponentName>.
bin/magento module:status3. Enable the extension and clear static files using the following command:
bin/magento module:enable J2t_Payplug --clear-static-contentThe following message should appear:
The following modules have been enabled:- J2t_PayplugTo make sure that the enabled modules are properly registered, run 'setup:upgrade'.Cache cleared successfully.Generated classes cleared successfully. Please run the 'setup:di:compile' command to generate classes.Generated static view files cleared successfully.
4. Register the extension by running the following command:
bin/magento setup:upgrade5. Compile the project.
In Production mode, you can receive a message asking you to run the compilation command for Magento again. In Developer mode, the application doesn't require the compilation command to be run.
bin/magento setup:di:compile6. Make sure the extension was installed:
bin/magento module:status J2t_PayplugYou must see confirmation that the extension is no longer disabled:
Module is disabled7. Clear cache:
bin/magento cache:clean8. Set up the extension.
How to log in to Admitad
1. In your Magento account, open the Configuration section (Stores → Configuration).
2. Click the Admitad Tracking plugin name to jump to its settings.
3. Fill out the following fields in the new form:
- Client ID and Client Secret. To get these values, open the API and applications in your Admitad account (Account settings section). In API credentials, click Show credentials and copy the credentials.
- Param Name. This field will be pre-filled. You can leave this parameter name unchanged.
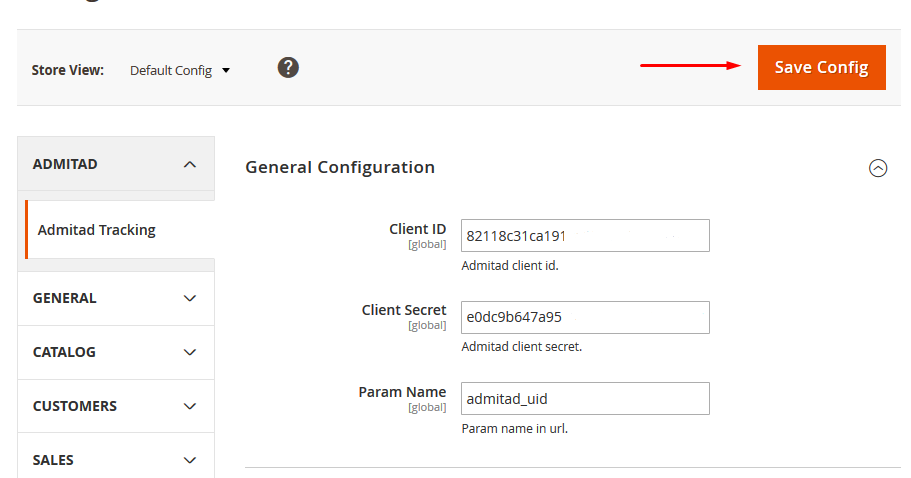
4. Click Save config.
How to activate target actions and rates for an order with a promo code
You can select and activate actions and rates that will be used for an order with a promo code. In such a scenario, when a customer of your Magento-based store enters a promo code, the action and the rate you set up will be used.
1. In your Magento account, open the Configuration section (Stores → Configuration).
2. In General Configuration, expand the dropdown list next to Paid order.

3. Fill out the following fields:
- Action. Select Sale from the dropdown list for the active target action used in the program.
- Category 1 and Category 2. Distribute product categories according to the target action rates created in the Admitad account.
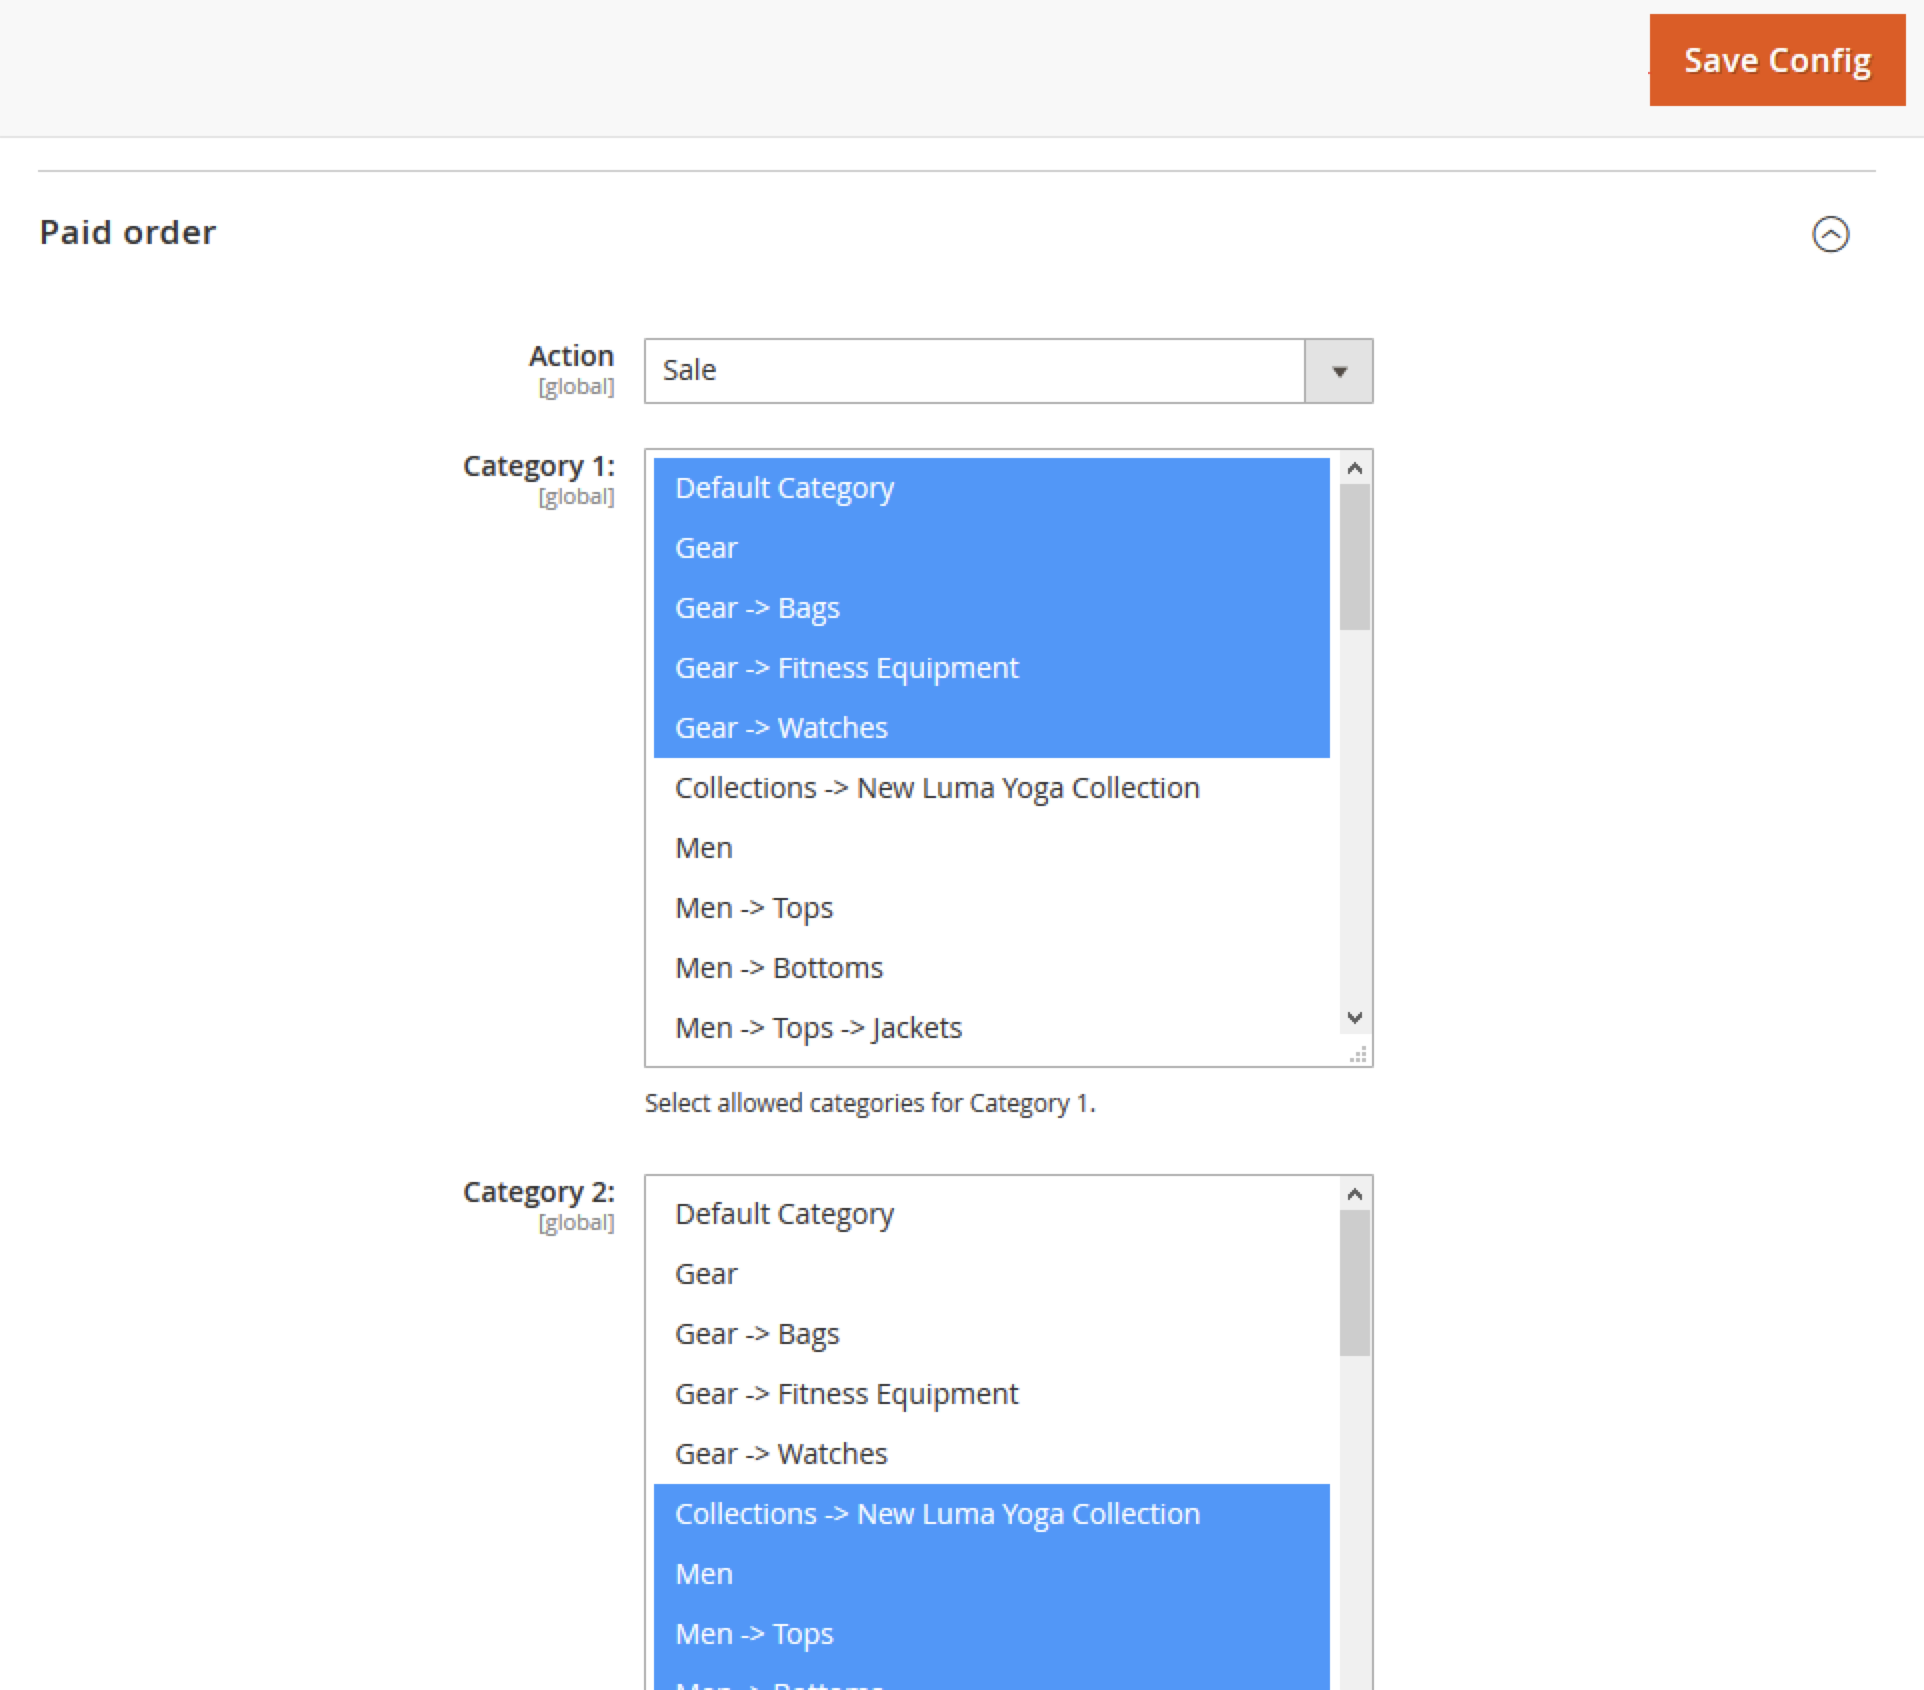
4. Click Save config in the upper part of the page.
How to test integration after setup
1. Contact your Admitad manager and request an affiliate link for testing.
2. Click the link and complete the target action according to the terms of your program.
Integration testing tips:
- If you have several actions and/or rates, place a few test orders to try out all actions and rates.
- Include several items in one of your test orders to make sure the items and the total amount are generated correctly.
- If you have a quick order or one-click order form, use it to place an order and test the form integration.
The test order will appear in Admitad statistics within an hour.
If the order doesn't show up in reports after an hour or more, make sure the plugin is set up correctly (see this guide). If the problem persists, report it to the Admitad specialist.
3. Go to your Admitad account → Reports → By actions. Check that the report correctly shows the target action and its data:
- The target action corresponds to the partner program settings.
- The action ID in the Order ID column matches the action ID in your system.
- The order amount in Admitad corresponds to the test order amount.
4. Let a manager know when your test is over. They'll prepare your program for launch.
You're all set! The integration plugin has been tested.
How to remove the plugin from your website
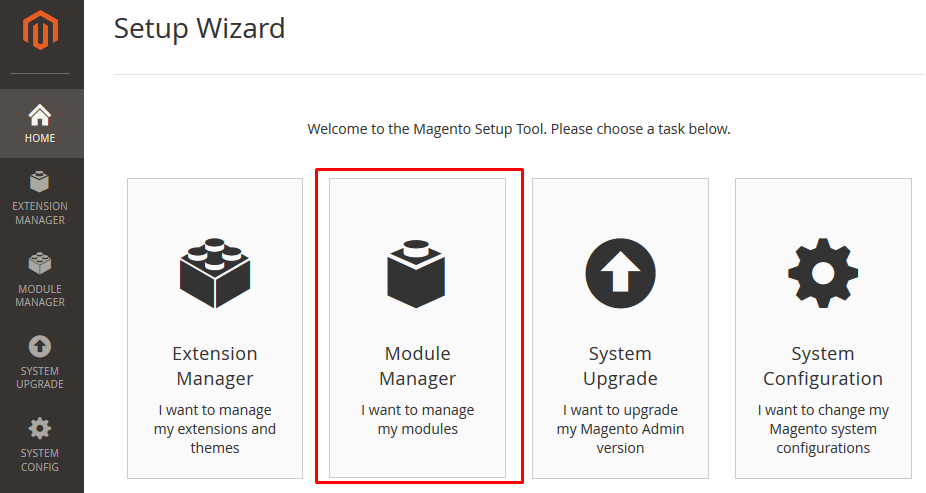
1. In your Magento account, open Module Manager (System → Web Setup Wizard → Module Manage).
2. Click Disable next to admitad/track and confirm removal in the pop-up notification.
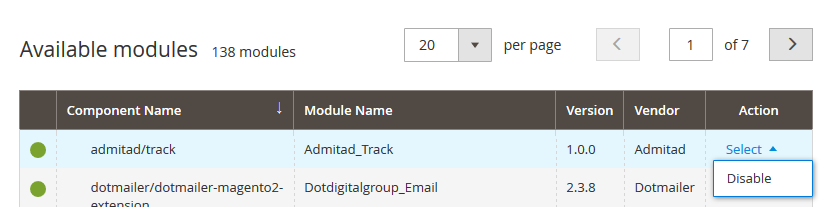
The plugin will disappear from the list of installed applications after you refresh the page.