
If your website is WordPress-based, you can easily integrate it with Admitad using an Admitad plugin.
A plugin is a software module that you need to install and set up on your website. As a result, your website will be integrated with the Admitad system.
General information: specifics and tips
- You can only initiate integration if your program has:
- A tracking link generated in General Settings.
- A target action added and a related rate set up in Actions.
If you don't have a manager, you'll need to generate a tracking link on your own (see this guide) and add at least one action and at least one rate (see this guide).
If you have a personal manager, they will do this for you.
- Integration is a mandatory step to continuing your work and starting an affiliate program with Admitad.
- To set up integration, you need to have access to your website's WordPress admin panel. If you don't have access to it, send this integration guide to a colleague who does.
Once integration is complete, all target action details (date, order ID, order amount, etc.) will be sent to Admitad automatically.
How to install a WordPress plugin on the website
Before installing and setting up the plugin, make sure the WooCommerce module from WordPress is installed and set up in the Plugins section of the admin panel of your website.
You can install the plugin in any of the two ways:
How to install a WordPress plugin automatically
1. Open the admin panel of your website. Go to Plugins (1) and click Add New (2).
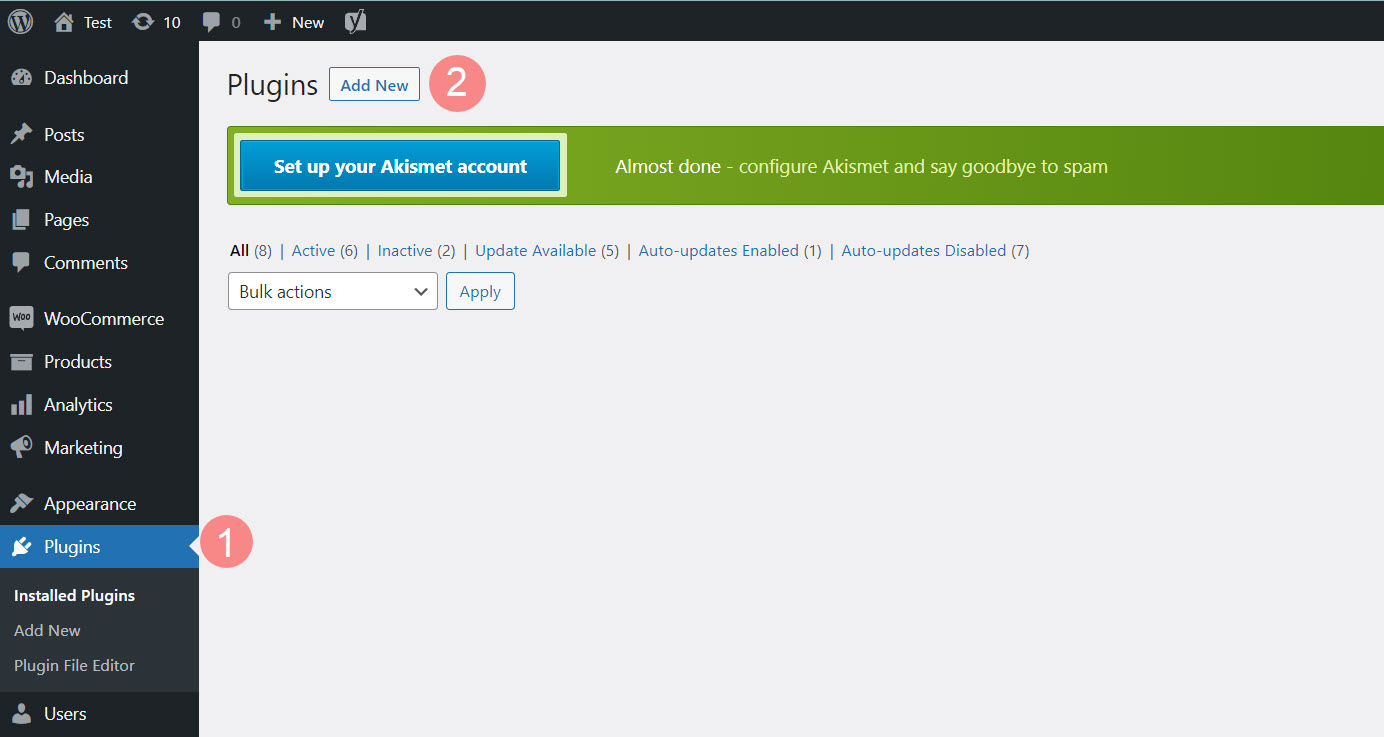
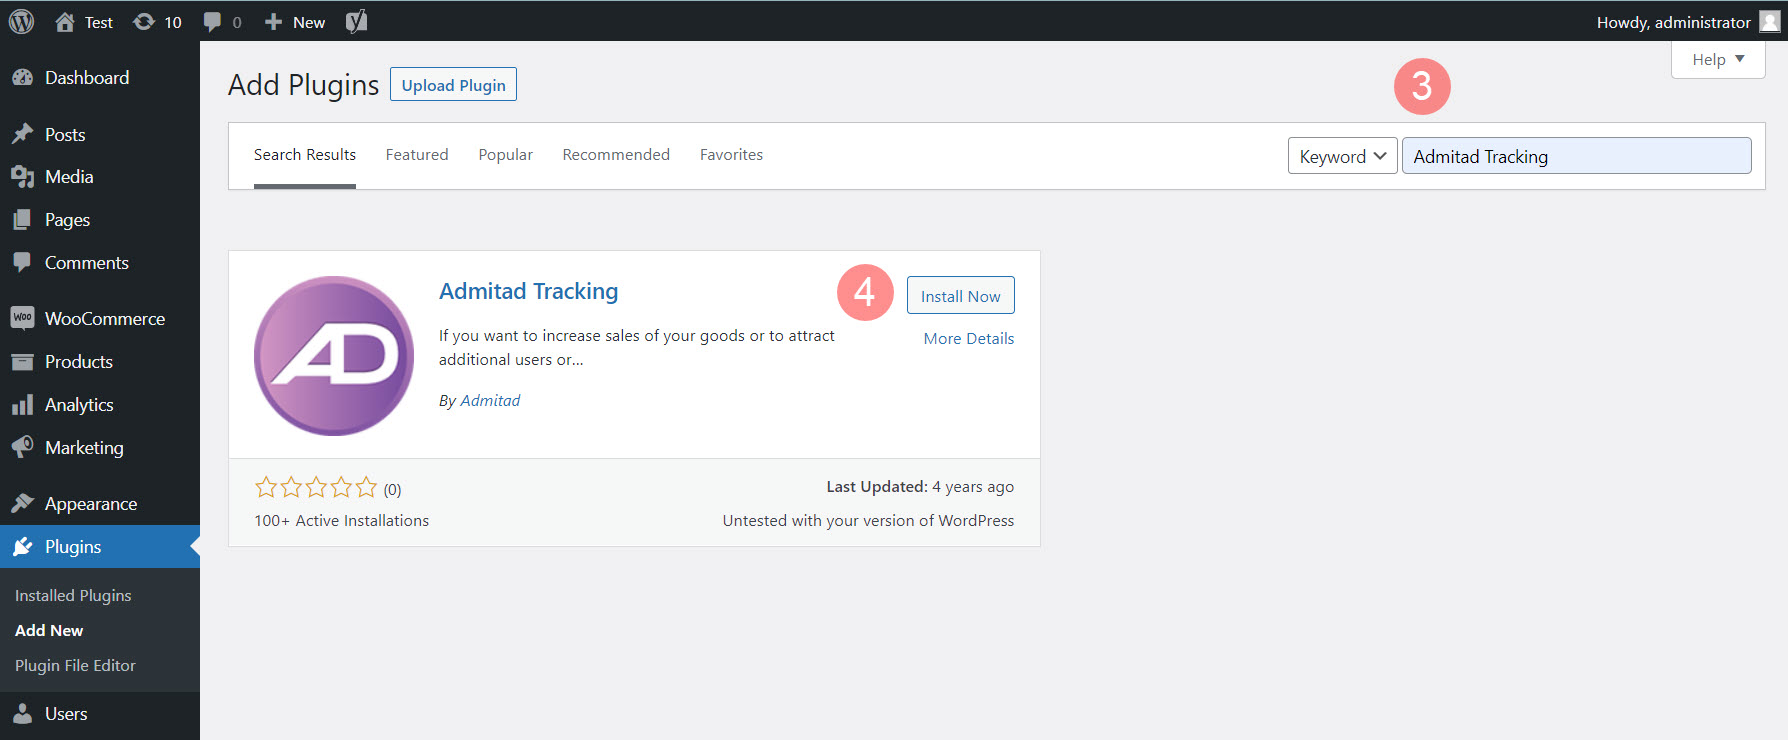
2. In the search field, type Admitad Tracking (3) and press Enter. The Admitad Tracking plugin will appear on the page.
3. Click Install Now (4).
4. Once installation is finished, click Activate Plugin.
Done! The plugin is now installed. It will appear in the Plugins section among all other installed plugins.
You now need to log in to Admitad following this guide.
How to manually add a WordPress plugin
1. Go to https://wordpress.org/plugins/admitad-tracking/ and click Download to download a ZIP archive with the plugin source.
The archive will be downloaded to your local drive.
2. Open the admin panel of your website.
Go to Plugins and click Add New.
3. Click Upload Plugin.
You will see the plugin upload form.
4. Click Choose File, select the downloaded ZIP archive, then click Install Now.
Once installation is complete, you will see the message "Plugin installed successfully."
5. Click Activate plugin.
Done! The plugin is now installed. It will appear in the Plugins section among all other installed plugins.
You now need to log in to Admitad following this guide.
How to log in to Admitad
1. Open the admin panel of your website and go to Plugins.
2. In the Admitad Tracking plugin section, click Settings.
3. On the new page, fill out the required fields to log in to Admitad:
- ID. Specify your client_id value*.
- Secret key. Specify your client_secret value*.
* To get a client_id and client_secret, go to Settings → API and applications in your Admitad account. In API credentials, click Show credentials and copy the respective values.
4. Click Save changes.
Done! You are now logged in to Admitad.
Now you can set up the integration plugin.
How to set up the WordPress integration plugin
1. Open the admin panel of your website and go to Plugins.
2. In the Admitad Tracking plugin section, click Settings.
3. Set up the plugin in the following tabs:
General settings
1. In the General settings tab, the values you specified when logging in to Admitad will be automatically added to the Campaign code and Postback key fields.
2. In the Currency code field, specify the three-letter program currency code per ISO 4217. Example: EUR.
3. Click Save changes and go to the Actions and rates tab.
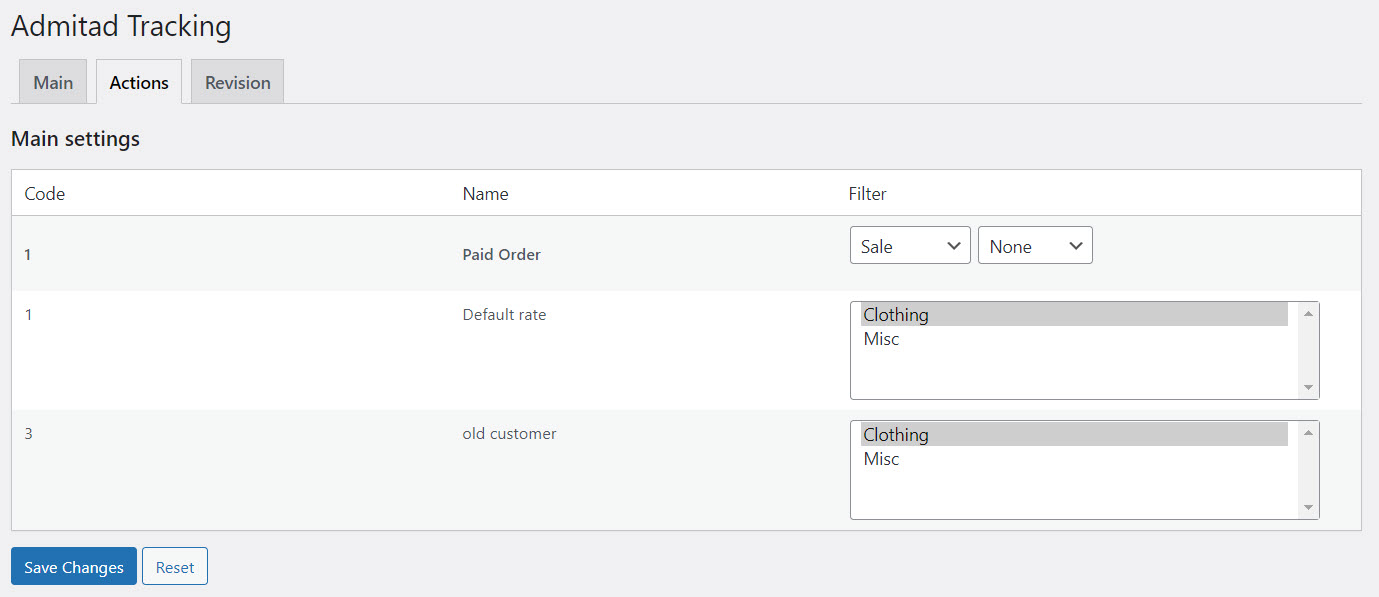
Actions and rates
1. The Actions and rates tab shows the actions and rates according to your program settings in Admitad Partner Network.
2. Specify the target action type and user type in the corresponding string:
- In the last column, select Purchase from the dropdown list (1).
- In the next dropdown list (2), select:
- New user if the target action was created for new users.
- Old user if the target action was created for existing users.
- N/A if the target action was created for all users.
3. Choose product categories according to your program's rates in the corresponding string (3):
4. Click Save changes. Done! Your plugin is now set up and your website integrated with Admitad.
Don't specify settings in the Automatic verification tab. This function is under development. Learn more about verification, its types, and setup methods from this article.
To reset plugin settings, go to the tab with the settings you are going to reset, then click Reset.
The login page will appear after you reset the settings. To continue using the plugin, you will have to log in to Admitad again.
How to test integration after setup
1. Get a test affiliate link on the Setting up integration for WordPress (WooCommerce) page in the Integration testing section.
-
1.1 In your account, go to the Integration section (Program → Integration).
1.2 Click Next, and on the Integration methods page, select WordPress (WooCommerce). Click Next.
1.3 The Integration testing section is located on the bottom part of the screen.
2. Follow the link and perform the target action according to the program terms.
Integration testing tips:
- If you have several actions and/or rates, place several test orders to try out all actions and rates.
- Include several items in one of your test orders to make sure the items and the total amount are transmitted correctly.
- If you have a quick order or one-click order form, place an order through it to check form integration.
The test order will appear in Admitad reports within one hour.
If the order doesn't show up in reports after an hour or more, make sure the plugin was set up correctly (see this guide). If the problem persists, let the Admitad specialist know about it.
3. Go to your Admitad account → Reports → On actions and make sure the target action and its details are shown correctly in the report:
- Target action meets the requirements specified in the program terms.
- Action ID in the Order ID column matches the action ID in your system.
- Order amount in Admitad matches the test order amount.
4. Notify the Admitad Partner Network specialist once testing is over. They will start preparing your program for launching.
You're all set! The integration plugin has been tested.
How to remove a WordPress plugin from the website
1. Open the admin panel of your website and go to Plugins.
2. In the Admitad Tracking plugin section, click Deactivate, then click Delete.
You will see the message "Admitad Tracking deleted successfully."
Done! The Admitad integration plugin has been deleted.
If you are going to use the plugin in the future, you can deactivate it without deleting it. In this case, the plugin will remain among other installed plugins.
To use the plugin again, click Activate in the Admitad Tracking plugin section, then log in to Admitad and set up the plugin.