
In Settings, you can manage your publisher account, including your ad spaces, notification settings, and guest accounts. This is also where you can obtain your API credentials.
In addition, the Settings section is where you can access Mitgo ID, a single account for everything Admitad. From there, you can manage your Admitad account, including your personal information and security settings.
How to access your publisher account settings
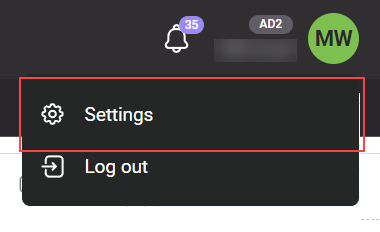
1. Hover over your username in the top-right corner and select Settings from the dropdown list.
2. The General section will open. Click the corresponding tab to move to the section you need.
Below you will find a description of each section.
General
In the General section, you can add and update your contact information and general account settings. From here, you can also access your Mitgo ID account to update your personal details and security settings.
The section consists of two modules:
General
- Username is your username in the Admitad.
If you wish to delete your account, you can click Delete account on the right (see how to delete your account). - Publisher ID is your unique Account ID. It cannot be changed.
- Name is your full name.
- To configure this setting, click Edit.
- On the opened Personal information page in Mitgo ID, enter your name by following these steps.
- Email is the primary email address that you provided during your registration.
- To provide your primary email address, click Edit.
- The Security section in Mitgo ID will open. Enter your email address by following these steps.
- Default language is the language of your publisher account interface.
- To customize your language settings, click Edit, select your language, and save the changes.
- Default currency is the currency in which your earnings are calculated and displayed in the 30-day report section on the Main page. For more information, see What else is determined by your selected default currency.
- To customize your currency settings, click Edit, select your currency, and save the changes.
- Your country is your country of residence.
- To customize this setting, click Edit.
- On the opened Personal information page in Mitgo ID, enter your country of residence by following these steps.
- Password is the password you use to log in to your account.
- To change your password, click Edit.
- The Security section in Mitgo ID will open. Enter your new password by following these steps.
- Date of birth is your date of birth.
- To provide your date of birth, click Edit.
- On the opened Personal information page in Mitgo ID, provide your date of birth by following these steps.
- Company name is the name of your company if you have joined the Admitad as a company.
- To provide or update your company name, click Edit, specify your company name, enter your account password, and save the changes.
- Monetization of error traffic is an option for additional monetization of user affiliate clicks to non-existent domains. We are currently testing this option. You can disable this option if you don't want your traffic to be used in testing.
- To enable or disable this setting, click Edit, select your preferred setting, and save the changes.
Contact information
- Mobile is your mobile phone number. It is used to protect your account. For more information, see How to add or update your phone number.
- Skype is your Skype username. This field is optional.
- To add or update your Skype username, click Edit, enter your new Skype username, and save your changes.
- ICQ is your ICQ number. This field is optional.
- To add or update your ICQ number, click Edit, enter your ICQ number, and save the changes.
Ad spaces
From the Ad spaces page, you can access the list of all your ad spaces. You can sort the list by ad space name (in forward or reverse alphabetical order) and by ad space status.
Ad space status
In the Admitad, the status of an ad space can be any of the following:
- Inactive: The ad space is pending confirmation. Only website, web service, social network-type, ad spaces can have this status. Click the status to go to the confirmation page. How to confirm that you own an ad space
- Active: The ad space is ready for use in the Admitad. You can connect the ad space to your programs and place your affiliate links there.
- Blocked: The ad space is blocked and thus can't be used to work with affiliate programs. It can only be deleted. To view the reason for blocking, click the question icon to the right of the status.
Adding, editing, and deleting ad spaces
To add an ad space, click Add new ad space (see how to add a new ad space).
You can't change the type of ad space you've already added. If you selected incorrect ad space type, delete it and add once again with a correct type.
To edit your ad space, click Edit.
- If the ad space is active, you can only change its name.
- For inactive ad spaces, you can change both the name and the link.
- Blocked ad spaces can only be deleted.
To delete an ad space, click Delete.
- If you delete an ad space, it will be disconnected from all your programs, and any other agreements with advertisers will be canceled.
- You may not restore a deleted ad space, but you can add it as a new one.
Notifications
In the Notifications section, you can configure which notifications you wish to receive separately in:
- The Notification Center of your personal account.
- Your email inbox.
For more information about notifications and the information they provide, click the question icon to the right of the notification name (if provided).
To configure your notifications:
- Check the box if you wish to receive this type of notification.
- Uncheck the box if you wish to unsubscribe from this type of notification.
Any changes you have made will take effect immediately in the Notification Center.
Make sure to save your settings in Email notifications. To do this, select your email address on the right side of the screen and click Save changes.
After you have selected the types of notifications you wish to receive, click Save changes on the right side of the screen. Done! You will now receive the types of notifications you specified at the email address you provided.
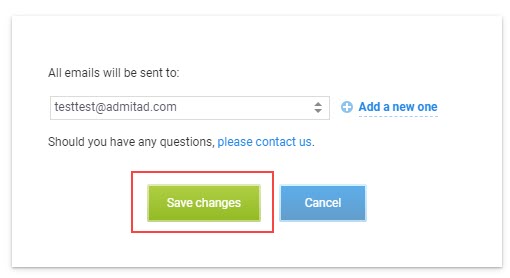
If you have more than one email address on file, make sure to select from the dropdown list on the right the email address for which you wish to configure your notifications. Alternatively, you can add a new email address by following these steps.
Payment information
In the Payment information section, you can access your Admitad Earnings, a payment service for Admitad affiliates, through which you can manage your payments and conveniently withdraw your earnings.
In your Admitad Earnings account, you can:
- Add a new method for withdrawing money (see how to add a new withdrawal method).
- Withdraw your earnings (see how to withdraw money).
- View the history of your financial transactions and download withdrawal request statements (see how to view financial history).
Guest accounts
Guest accounts are useful if you work in a team or have employees who report to you. On the Guest accounts page, you can create several guest accounts, to which you can allow access to selective sections of your personal account. How to set up guest accounts
API and apps
In the API and apps section, you can view your API credentials and the list of all the apps to which you have allowed access to your Admitad account. For more information about the API and how to use it, refer to the Admitad API documentation.
Account security
Click this tab to set up two-factor authentication.
In the Security section in Mitgo ID that opens up, set up two-factor authentication by following these steps.