
There are a few simple steps to start working with Takefluence.
Sign up
To sign up for Takefluence, all you need is a social network, Google, TikTok, Facebook, or email account.
- Sign up with Mitgo ID.
Mitgo ID is a service that gives you access to all our products and lets you manage them with a single account.
- Specify your Google, TikTok, Facebook, or email account and set a strong but memorable password.
- Be sure to check the "I accept the Terms of Use" and the "I agree to receive notifications about special offers, news and products" boxes. We'll only send the most important notifications that are useful for your work.
- Click Sign up.
Fill in the contact info
After signing up for Takefluence, you will be asked to provide your contact details. Please provide the contacts that you’re actively using, as they will be required for the further assistance on our side.
- Fill in the following fields:
- First name
- Last name
- Contact email
- Contact phone number
- Brand name
- Website or social media link
- Select the currency. The selected currency will be used in your offers and as the currency in which all payments are conducted.
- Select your plan. The rate plan determines the services that will be available to you.
- Be sure to check the "I accept the "Terms of Use", consent to the processing of my personal data and confirm that I have read the "Privacy policy"" box.
- Click the Next step button.
Pay for the subscription
After filling in your contact details and clicking Next step, you will be redirected to the "Stripe" payment service.
The payment amount will depend on the plan that you've previously selected.
Note that all the plans have a free 14-day trial period.
- Fill in the following details:
- Your Email. Enter the email address to which the receipts will be sent.
- Card information. Enter your bank card details.
- Cardholder name. Enter the name stated on the card.
- Select the Country or region.
- Click Pay.
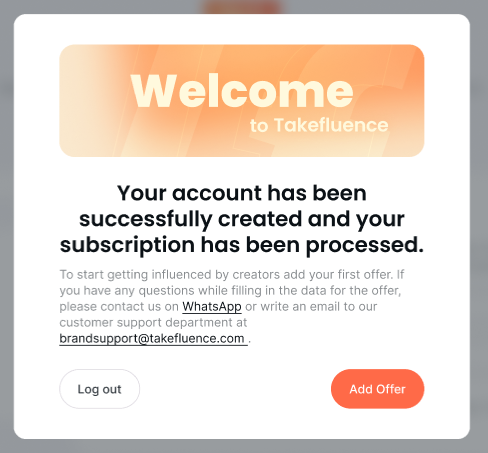
Your subscription is activated.
Create the brand and offer cards
Once you’ve signed up and paid for the subscription, it’s time to tell the social media creators about your brand and collaboration offer.
To start creating the brand and offer cards, it’s enough to provide the brand name on the previous step. Later, our manager will reach out to you to ask for/check the contact information.
1. Click Add Offer, and you’ll be redirected to the Creating a Brand card.
2. Fill in the information about your brand in 5 blocks:
-
- Enter the Brand name.
- Enter the Site URL. Provide the link to your brand’s site or social media.
- Add logo image. Click this button to add your logo in SVG format. Note that the image size can’t be more than 200 Kb.
-
- Select the Brand categories. When creators are choosing the brands to collaborate with, they pay attention to the brand categories to see which will suit their social media best. Stating the category will help them find your brand.
- Select the Countries of operation. Choose countries in which you want your brand to be advertised. If you don’t have any preferences, select the option All countries.
-
Select the currency in which your offers will be shown, and the creators will be paid.
-
Provide all the information about your brand that you find essential for the creators to use in their advertisements.
-
You can set the limitations for the creators who work with your brand. For example, the themes and scenarios you don’t want your brand to be associated with.
- Click Next. You will be redirected to the Creating an Offer card.
- Fill in the offer details in 6 blocks:
-
- Select the Type of Action. Select the type of action performed by creators.
- Select the Collaboration lifetime hours. This is the period within which one collaboration is active.
- Check the box Is recollaboration possible? if you agree to collaborate with a creator again in case they fail to meet the requirements of the first collaboration. If you disagree, leave the box unchecked.
- Enter the Recollaboration days if you’ve checked the Is recollaboration possible? box.
-
- If you want to review and approve creators and their content before they participate in your offer, enable the Activate additional verification option.
Note: if you select “Payment for publication” as the Type of action in the Main block, verification is activated automatically if you enable "Content Review" option or if the commission value exceeds 10 USD or a similar amount in the currency of your offer.
- Enable the Content Review required option if you want to review and approve promotional content submitted by creators before it goes live.
Note: if this option is enabled, a creator will send you the content for review before posting it on their platform. If you decline the content, it will be returned to the creator for editing. If you decline the content 3 times, the collaboration will be cancelled.
-
- Select the Commission type. Select the pricing model.
- Enter the Commission value. State the reward that creators will receive for collaborating with your brand and meeting the offer requirements.
- Enter the Commission description. Tell about the additional bonuses if your offer has any.
- Fill in the Discount field if you offer a discount.
-
Select the period within which the offer is active.
- Start date
- Finish date
-
- Describe the Visual theme of content. In this field, you can tell the creators which visual theme you prefer your brand to be advertised in.
- Enter Hashtags and mentions. Provide the hashtags in the format "#hashtag" and mentions in the format "@brandname". You can add several hashtags and mentions by clicking Add after each one.
-
- Select the Social network. This parameter determines in which social media your brand can be advertised.
- Select the Verification type. Decide how the creators will be asked to verify their social media to collaborate with your brand.
- Enter the Follower count. State the minimum number of followers the creators must have to collaborate with your brand.
- Click Add one more if you want to select more than one social network.
-
Provide the link to the materials that can be used by creators in their advertisements.
- Click Preview to see how your brand offer card will be shown to creators and check the information, or click Save offer right away.
On the Brand offer card preview page, click Back to edit if you want to change some information or Save offer if the offer is ready for posting.