
There are two groups of pages on Takefluence you can access from:
| Main page: | Account menu: |
Main page
After you complete registration, the first page you see is Dashboard. This is where the main page starts. Here, you can find:
In the upper right corner, you can see the account icon. If you click it, you will see the menu leading you to the account pages. The account icon is visible on every page, so it can be easily accessed.

Dashboard
Dashboard is your starting point on Takefluence, where you can find:
- Popular categories
Here, you’ll find quick-access cards for the most popular brand categories. Click a card to explore brands and their offers within the category. To view all brands, click Go to Brands.
- Your balance
This is a summary of your Balance page, showing the status of your funds:
- Available. The amount you can withdraw from your account.
- Processing. The amount you requested to withdraw.
- Paid. The amount you have successfully withdrawn.
To view full payment details, click Go to Balance or go to the Account menu → My balance.
- Statistics
This block provides a brief overview of your publication statistics. You can see the number of orders and your earnings for the current month. To see more details, click Go to Reports.
- Top CPP and CPA offers
There are up to 5 most popular offers with rewards for publications, as well as up to 5 most popular offers with rewards for orders placed using your promo code.
These lists can change based on brand ratings. To see all offers, click Go to Brands.
Brands
In Brands, you can find a full list of brands available for collaboration. You can search for a specific brand using the Search brands field, or narrow the list using filters.
By default, the Your best matches filter is applied, showing brands with offers that best fit your platform. If the list is empty, switch to the All brands filter to view all available brands.
If the brand you're looking for isn't listed, click Suggest a brand to submit it for potential collaboration.
How to choose the brands to work with
Promo codes
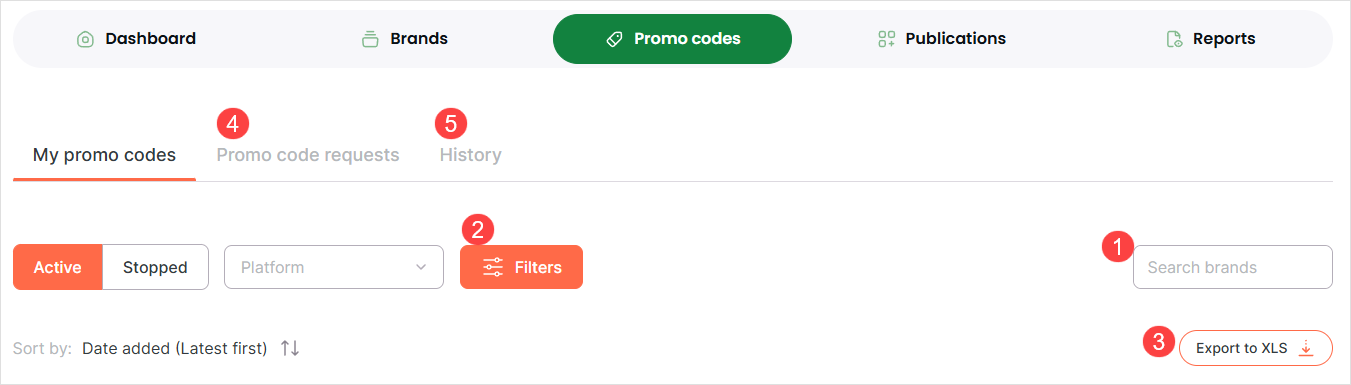
The Promo codes page shows promo codes provided to your platform(s) by brands.
How it works: You share your promo code with your followers and earn from each order made with the promo code.
- Use the Search brands field (1) to find a specific brand.
- Apply filters (2) to narrow results.
- Click Export to XLS (3) to download the list of promo codes as an Excel file.
If the My promo codes tab is empty, go to Brands, find a CPA-offer and request a promo code. Such requests will be shown on the Promo code requests tab (4), where you can track their status.
The History tab (5) lists promo codes that were once issued to you but later suspended by the brand.
To learn more about using promo codes, see CPA collaboration flow in Takefluence.
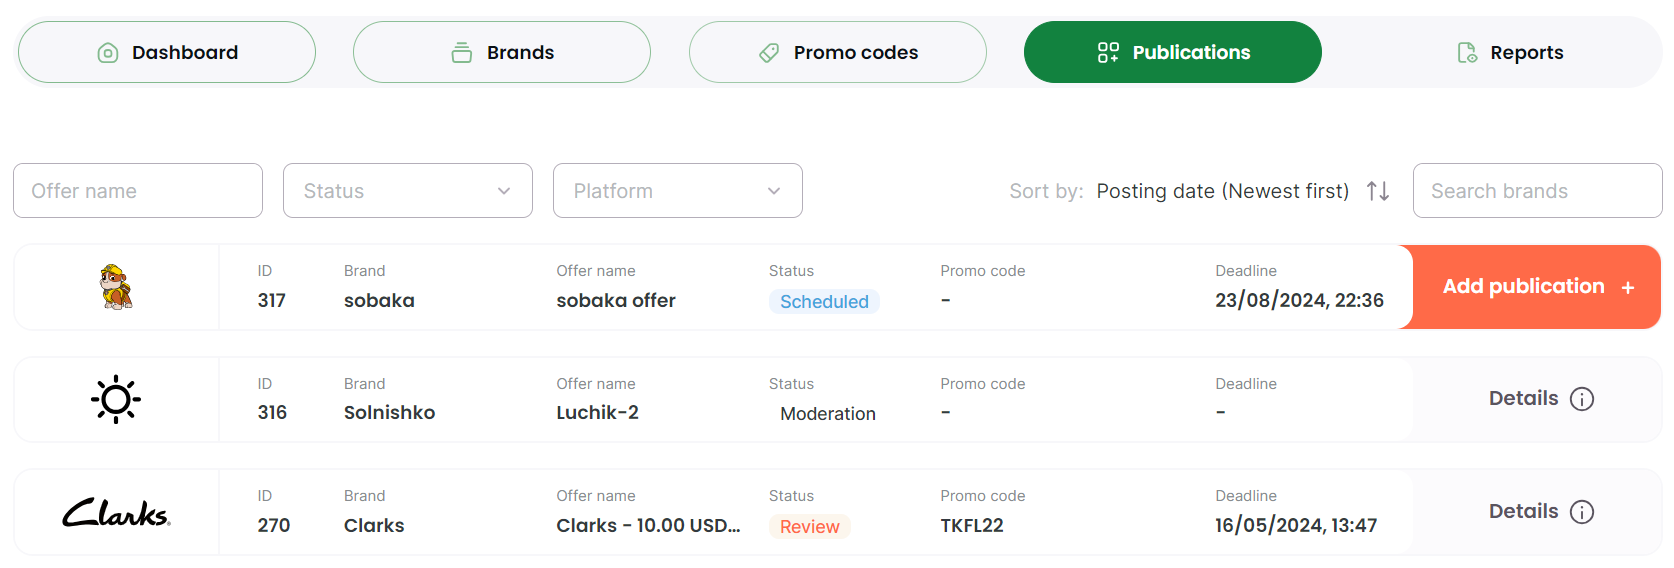
Publications
On the Publications page, you can see all your collaborations with brands. The type of publication depends on the Pricing model of the collaboration. This may include posting a promo code or creating an advertising post.
Here you can see the Status of the publication, the Deadline, and upload the confirmation screenshots and links.
Moderation
The status means that the brand hasn't confirmed your platform yet. Once confirmed, the status will change to Scheduled, and you will be able to add a publication details. If the brand doesn’t confirm your platform, the status will change to Rejected.
This status is used only for offers where Moderation required is marked Yes in the Require moderation section in the offer card.
Content review
Some brands prefer to review the content that you create before publishing.You can check this in the Require moderation section of the offer card. If Content Review required is marked Yes, you need to submit your content (video or image) for approval.
After submitting the content, the status will change to Review.
If the brand approves the content, the status of the publication will change to Scheduled, and you will be able to post the content on your platform. Then, provide the publication link by clicking Add publication.
If the brand declines your content, you can edit it and provide for review up to 2 more times. If the brand declines your content 3 times, the collaboration will end.
Make sure to meet the Deadline, otherwise the offer will be overdue.
Scheduled
The status means you have started a collaboration with the brand. You can now post your content and provide the publication details. Make sure to meet the deadline, otherwise, the offer will become overdue.
Once you submit the publication details, the status changes to Review.
Review
This status means the brand is reviewing the publication on your platform after you submitted the publication details during the Scheduled status.
- If the brand approves the publication, the status will change to Confirmed, and you will get a reward for this collaboration.
- If the brand rejects the publication, the status will change to Rejected, and the collaboration ends.
Confirmed
The status means that the brand has approved the content you published on your platform. The reward for the collaboration will be credited to your balance.
Rejected
This status means that the brand has rejected the collaboration on one of the steps. In this case, the collaboration ends, and the advertiser will not pay for it.
You can find the rejection reason from the brand by clicking Details.
Overdue
The status means that you haven’t met the deadline on one of the following steps:
- providing the promotional content for the brand’s review before posting it;
- providing the publication details after posting your content.
In this case, the current collaboration ends. You can apply for a new one, but make sure to meet the deadline.
Reports
The Reports page shows all orders made with your promo codes.
There, you can:
- See the full list of orders and check the status of each one.
- Track how much you earned for every order.
- Identify which promo code was used for the order.
- Download the report as an Excel file — click Export.
To manage the list:
- Use the Search brands field to find orders by promo code of a specific brand.
- Use the Filter button to find orders by offer name, status, country, order ID, or promo code.
- Reorder the list by date — click Sort by.
Account menu
Click the icon in the upper right corner to see the account pages:
Account
The Account page contains your personal information: email, password, your country and contact info.
You can edit the following information:
- Email and password: Click Edit, and you will be redirected to your Mitgo ID account, where you can update them.
- Contact info: Click Edit to modify existing details, or select New contact info to add a new contact.
You cannot delete contact information yourself — to remove it, please contact us at support@takefluence.com.
You cannot change the country that you specified during sign-up.
My platforms
On the My platforms page, you can view and manage all your social media platforms and track their verification status. You can also add a new platform at any time here.
To add a platform, click the Add more button and follow the instructions from step 3 in the Add a platform guide.
To start working with brands, make sure that your social media account is verified. You can see the status on the right. If the status is not “Verified”, send us a message saying “Hello” in the social media account you have chosen.
My balance
On the My balance page, you can see your earnings and the amount available for withdrawal. Here, you can also find your transaction history and your balance statuses:
- Available. The amount you can withdraw from your account.
- Processing. The amount you requested to withdraw.
- Paid. The amount you have successfully withdrawn.
At the bottom of the page, you can find the link to Takefluence Telegram, where you can ask any questions you may have.
Withdrawals
Withdrawals is the page where you can withdraw your earnings and see your balance statuses:
- Available. The amount you can withdraw from your account.
- Processing. The amount you requested for withdrawal is being processed. This may take several business days.
You can also find the withdrawal history here.
For details on how to withdraw your earnings, refer to the article How to withdraw money from Takefluence.
Referral program
Takefluence referral program allows creators to earn extra money by inviting other people to the program.
On the Referral program page, you can:
- Find information about the number of your Registered referrals, Fulfilled conditions, and the total amount of the Bonus payment.
- Enter promo code from inviter. In this field, you can enter the promo code you received from a Takefluence user who invited you to the program.
- Share a referral link or a promo code with your creator partners. Here you can copy the link or promo code to invite a partner to the referral program. If your companion fulfills the conditions of the welcome bonus, both of you will be rewarded.
- See How our referral program works.
- See the answers to the FAQs. If you have a question about using our referral program, before you contact support, check if there is already an answer to your question. We will expand this block as we get more frequently asked questions.
Support
On the Support page, you can find contact information to submit a support ticket, as well as read the Privacy policy and Terms of use.
If you need support regarding your account, cashback tracking or claims, or if you have issues with anything else, you can email us at support@takefluence.com
Also, you can write to us in Telegram.