All Google Ads accounts use parallel tracking. The method is mandatory for Search, Shopping, Display, and Video campaigns. For Hotel campaigns, parallel tracking is optional.
This article will help you set up your ads correctly so that clicks and actions will still be tracked for your ads when parallel tracking is implemented.
Please strictly follow all the instructions below. Otherwise, Admitad does not guarantee your clicks and actions will be tracked correctly.
We recommend using the tool not only when creating new ads, but also for updating parameters of ones that are already running.
1. First of all, enable auto-tagging in your Google Ads account.
Read more about it in a Google article "About auto-tagging".
2. Go to the program's page. In the left menu, select Banners and Links — Google Ads.
If there is no such tab, it means that SEM is prohibited by the program rules.
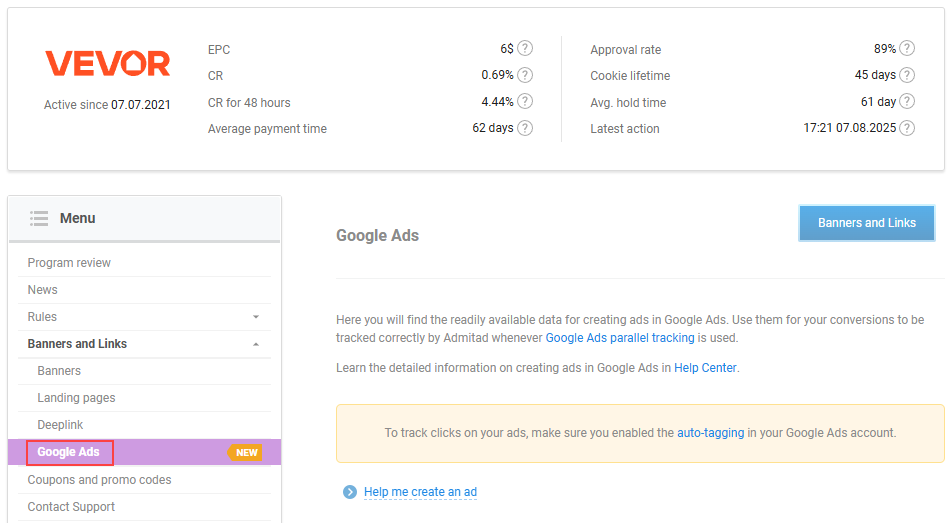
If you have several ad spaces, make sure that “Google Ads” is selected in the account header.

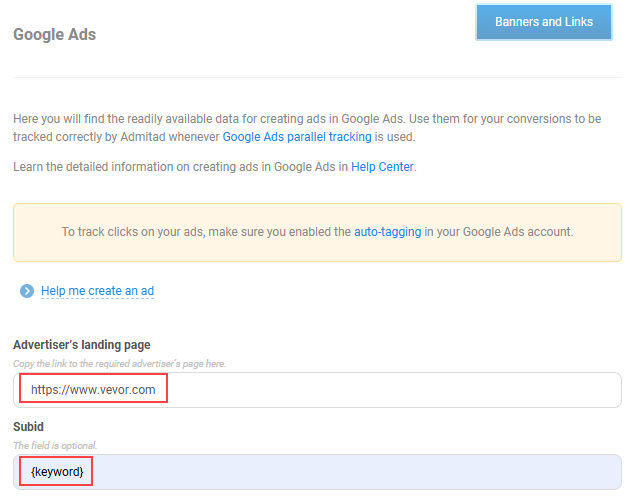
3. In the Advertiser’s landing page field, enter the address of the landing page, i.e. the page that the user should reach after clicking on the ad.
4. If you want to analyze traffic, add SubID in the format {parameter_name}. The text in braces will be replaced with the parameter value for this particular ad.
For example, if you want to compare the effectiveness of different keywords, add SubID {keyword}. Once someone clicks on your ad, instead of seeing {keyword}, a keyword itself ("iphone", "summer dress") will be inserted.
You can add up to 4 SubIDs in one ad.
5. The ready data will appear in the Links for your ad section.
Please note: The URL in the Final URL field is shown as an example, and it may differ from the actual URL you get after all redirects from the Tracking template field. Use the actual link when creating your ad.
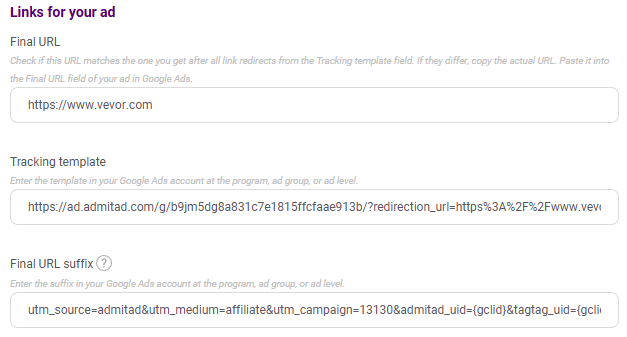
6. Copy the values from the Tracking template and Final URL suffix fields and add them at the level that corresponds to your cooperation with the program: account, campaign, group of ads, or individual ad.
This way, you will not have to specify them each time you create an ad.
For example, you have 3 programs: AliExpress, Shein, and GearBest — and for each program, you have a separate campaign in Google Ads. In this case, you should add a tracking template at the campaign level, without going down to the level of ad groups or individual ads.
To do that, in the left menu of your Google Ads account, select Settings.
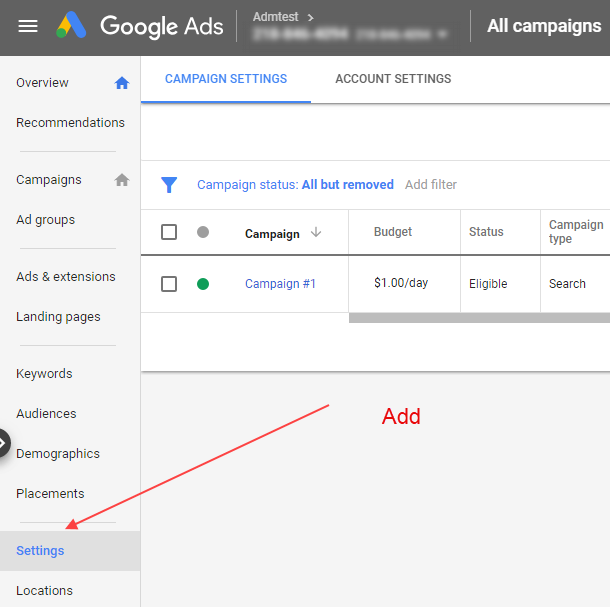
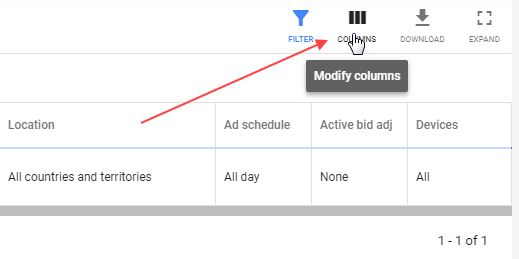
You will be redirected to campaign settings. Add columns Tracking template and Final URL suffix, if they are not in the table yet. To do that, click Columns in the upper right corner.
To add a tracking template, click on the pencil icon in the Tracking template field. Paste the tracking template generated by Admitad's tool and save changes.
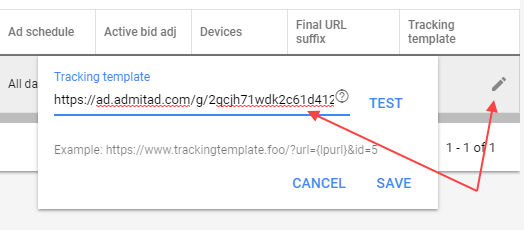
Similarly, add a final URL suffix.
Learn how to add tracking templates and final URL suffixes at the other levels in this Google article. Though it only tells about final URL suffixes, it can be also applied to tracking templates.
7. Unlike tracking templates and final URL suffixes, a final URL is pasted in the ad itself.
Please note: The URL in the Final URL field is shown as an example, and it may differ from the actual URL you get after all redirects from the Tracking template field. In this case, add the actual link to your ad.
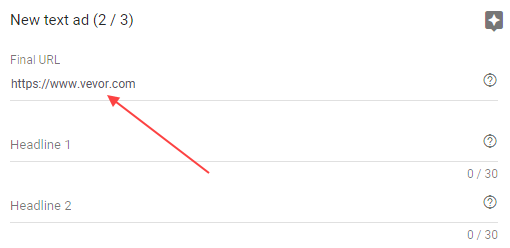
If the advertiser has given you an increased rate, use the tool to see whether “Final URL suffix” has changed. If it has, make sure to update it in your Google Ads account.


